The ELK stack stands for Elasticsearch, Logstash and Kibana. These three pieces of software are very useful since each brings a powerful capability that in combination is just great to use. Elasticsearch is a search and analytics engine. Logstash can process data from multiple sources. Kibana allows to visualize data in a graphic manner. These three capabilities combined is what makes this stack so powerful and popular.
The ELK stack on CentOS 8 can be used, just as an example, to get a graphical representation of Suricata’s network intrusion detection system (NIDS) alerts. See, making sense of an aggregation of logs is where the ELK stack shines. But it does the same when performing full text search, with Apache’s Solr permission. There are several use cases and all of them happen to be related to search and managing big volumes of data to analyze, scrap, cut and make sense of.
If you find the articles in Adminbyaccident.com useful to you, please consider making a donation.
Use this link to get $200 credit at DigitalOcean and support Adminbyaccident.com costs.
Get $100 credit for free at Vultr using this link and support Adminbyaccident.com costs.
Mind Vultr supports FreeBSD on their VPS offer.
Before we start the install be aware this combo typically consumes a signifficant amount of memory. Do not think you can get things done quickly by using a 1GB of memory device or VM. Elasticsearch just uses that amount on its own.
Packages are not found on the official repositories nor the EPEL repo. We need to find them at the official Elastic company’s site. However the first step on this how to install the ELK stack on CentOS 8 will be installing Java since the stack makes use of it. Before that just enable the EPEL repo. This other article on this same site may help with that.
[root@CentOS8 ~]# yum install java-latest-openjdk.x86_64
A list of dependencies will be displayed. Accept those and let the install go.
Now as we will do with the rest of the ELK stack packages we will follow the next steps:
-
-
- Import the key from the official repository
- Configure the yum repository file for each package
- Install the package
- Make the basic necessary configuration changes for it to work
- Enable systemd to manage the installed components
- Fire up the service using systemd
-
Elasticsearch.
We’ll start with the ‘elasticsearch’ package. Let’s import the key.
[root@CentOS8 ~]# rpm --import https://artifacts.elastic.co/GPG-KEY-elasticsearch
[root@CentOS8 ~]#
Once we have the key we’ll configure the repository entry.
[root@CentOS8 ~]# vi /etc/yum.repos.d/elasticsearch.repo
Inside we’ll place the following configuration:
[elasticsearch]
name=Elasticsearch repository for 7.x packages
baseurl=https://artifacts.elastic.co/packages/7.x/yum
gpgcheck=1
gpgkey=https://artifacts.elastic.co/GPG-KEY-elasticsearch
enabled=0
autorefresh=1
type=rpm-md
Now we have configured the elasticsearch repository it is time to install the package. With the same command we will also enable the just configured repo.
[root@CentOS8 ~]# yum install --enablerepo=elasticsearch elasticsearch
The elastichsearch component on this ELK stack installation needs some configuration changes now. Let’s go do them.
We need to find two parameters inside elasticsearch’s configuration: ‘network.host’ and ‘http.port’.
[root@CentOS8 ~]# grep -n 'network.host' /etc/elasticsearch/elasticsearch.yml
55:#network.host: 192.168.0.1
[root@CentOS8 ~]#
We need to uncomment line 55 by removing the ‘#’ at the beginning of the line and change the IP for the one we need to make use or just localhost. We’ll use localhost since this install will work only on this box (server).
Edit line 55 as follows:
[root@CentOS8 ~]# vi +55 /etc/elasticsearch/elasticsearch.yml
Before:
#network.host: 192.168.0.1
After:
network.host: localhost
Let’s now look for the ‘http.port’ line on the same configuration file.
[root@CentOS8 ~]# grep -n 'http.port' /etc/elasticsearch/elasticsearch.yml
59:#http.port: 9200
[root@CentOS8 ~]#
Now we will edit line 59 and we’ll adjust it so the directive is uncommented and therefore enabled to work.
[root@CentOS8 ~]# vi +59 /etc/elasticsearch/elasticsearch.yml
Before:
#http.port: 9200
After:
http.port: 9200
We need to enable the service ‘elasticsearch’ to fire up at boot time using systemd.
[root@CentOS8 ~]# systemctl enable elasticsearch
Synchronizing state of elasticsearch.service with SysV service script with /usr/lib/systemd/systemd-sysv-install.
Executing: /usr/lib/systemd/systemd-sysv-install enable elasticsearch
Created symlink /etc/systemd/system/multi-user.target.wants/elasticsearch.service → /usr/lib/systemd/system/elasticsearch.service.
[root@CentOS8 ~]#
First time to fire up this service.
[root@CentOS8 ~]# systemctl start elasticsearch
[root@CentOS8 ~]#
We check if the service is up and running.
[root@CentOS8 ~]# systemctl status elasticsearch | grep 'active'
Active: active (running) since Thu 2020-04-02 11:16:24 CEST; 1min 50s ago
[root@CentOS8 ~]#
To list the active elasticsearch processes you can use the ‘ps’ command.
[root@CentOS8 ~]# ps -ef | grep 'elasticsearch'
The first package has just been installed and configured. The rest of the packages install process is very similar, the only thing that changes is the configuration bits for each.
Logstash.
Time now for Logstash on this ELK on CentOS 8 guide. We now need to edit the configuration file for the repository to be enabled. Again, as before, we already have the key.
[root@CentOS8 ~]# vi /etc/yum.repos.d/logstash.repo
Place the following configuration bit.
[logstash-7.x]
name=Elastic repository for 7.x packages
baseurl=https://artifacts.elastic.co/packages/7.x/yum
gpgcheck=1
gpgkey=https://artifacts.elastic.co/GPG-KEY-elasticsearch
enabled=1
autorefresh=1
type=rpm-md
We now install Logstash.
[root@CentOS8 ~]# yum install logstash
We’re now ready to configure logstash. We’ll just change the configuration setting for the ‘http.host’ paramater to localhost. We first look for the line.
[root@CentOS8 ~]# grep -n 'http.host' /etc/logstash/logstash.yml
190:# http.host: "127.0.0.1"
[root@CentOS8 ~]#
We’ll enable the directive by removing the ‘#’ at the beginning of line 190.
[root@CentOS8 ~]# vi +190 /etc/logstash/logstash.yml
Before:
# http.host: "127.0.0.1"
After:
http.host: "127.0.0.1"
Time now for enabling logstash to be fired up at boot time.
[root@CentOS8 ~]# systemctl enable logstash.service
Created symlink /etc/systemd/system/multi-user.target.wants/logstash.service → /etc/systemd/system/logstash.service.
[root@CentOS8 ~]#
We fire up logstash.
[root@CentOS8 ~]# systemctl start logstash.service
And we check it’s up and running.
[root@CentOS8 ~]# systemctl status logstash | grep 'active'
Active: active (running) since Thu 2020-04-02 15:39:30 CEST; 1s ago
[root@CentOS8 ~]#
It is indeed. Alternatively we can use the ‘ps’ command.
[root@CentOS8 ~]# ps -ef | grep 'logstash'
Kibana.
Let’s grab kibana now, the K component on the ELK stack. Again as before we will create the repository file and then install kibana from there.
[root@CentOS8 ~]# vi /etc/yum.repos.d/kibana.repo
We place the following configuration bits:
[kibana-7.x]
name=Kibana repository for 7.x packages
baseurl=https://artifacts.elastic.co/packages/7.x/yum
gpgcheck=1
gpgkey=https://artifacts.elastic.co/GPG-KEY-elasticsearch
enabled=1
autorefresh=1
type=rpm-md
Install the package. Now.
[root@CentOS8 ~]# yum install kibana
Once it’s installed we need to configure it. We will enable the ‘server.host’ directive but first we need to look for the appearances of that configuration parameter so we can grab the exact line we need.
[root@CentOS8 ~]# grep -n 'server.host' /etc/kibana/kibana.yml
7:#server.host: "localhost"
30:# When this setting's value is true Kibana uses the hostname specified in the server.host
[root@CentOS8 ~]#
We’ll remove the ‘#’ symbol from the beginning of line 7 so the directive can be set on.
[root@CentOS8 ~]# vi +7 /etc/kibana/kibana.yml
Before:
#server.host: "localhost"
After:
server.host: "0.0.0.0"
Changing from ‘localhost’ to ‘0.0.0.0’ will allow any client (a browser will also help with that) will be able to visit the Kibana dashboard and start working.
We have enabled the ‘sever.host’ parameter, but now we need to enable the ‘server.port’. We look for it.
[root@CentOS8 ~]# grep -n 'server.port' /etc/kibana/kibana.yml
2:#server.port: 5601
[root@CentOS8 ~]#
It is sitting at line number two. We edit the file and we remove th ‘#’ symbol from the beginning of the line.
[root@CentOS8 ~]# vi +2 /etc/kibana/kibana.yml
Before:
#server.port: 5601
After:
server.port: 5601
Once both tasks are done, we enable kibana as a service at boot time.
[root@CentOS8 ~]# systemctl enable kibana
Synchronizing state of kibana.service with SysV service script with /usr/lib/systemd/systemd-sysv-install.
Executing: /usr/lib/systemd/systemd-sysv-install enable kibana
Created symlink /etc/systemd/system/multi-user.target.wants/kibana.service → /etc/systemd/system/kibana.service.
[root@CentOS8 ~]#
Time now to start up kibana.
[root@CentOS8 ~]# systemctl start kibana
We check it is up and running.
[root@CentOS8 ~]# systemctl status kibana | grep 'active'
Active: active (running) since Thu 2020-04-02 15:18:43 CEST; 46s ago
[root@CentOS8 ~]#
Alternatively make use of the ‘ps’ command.
[root@CentOS8 ~]# ps -ef | grep 'kibana'
kibana 2955 1 35 15:18 ? 00:00:33 /usr/share/kibana/bin/../node/bin/node /usr/share/kibana/bin/../src/cli -c /etc/kibana/kibana.yml
root 3020 1733 0 15:20 pts/0 00:00:00 grep --color=auto kibana
[root@CentOS8 ~]#
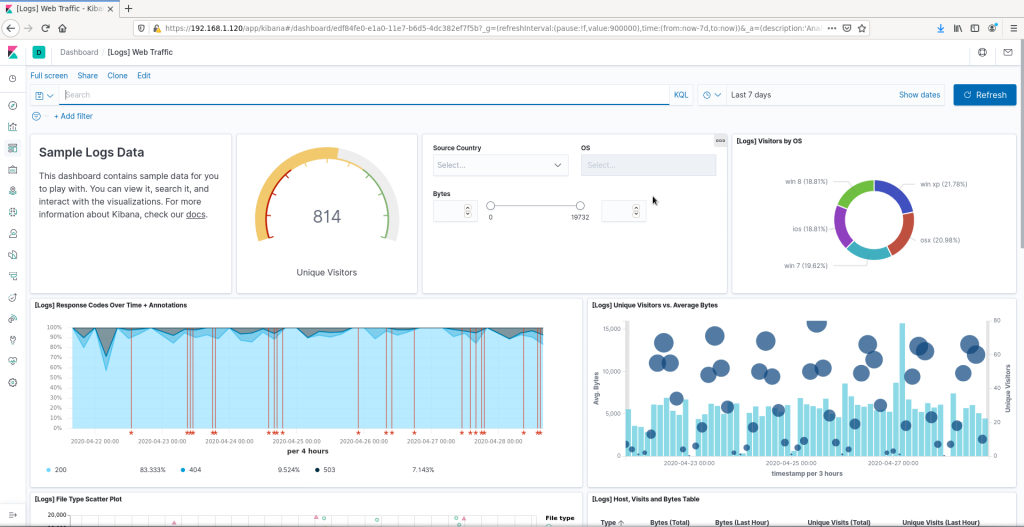
Once all the pieces are in place one can grab a browser and visit the following URL and start enjoying the ELK stack on CentOS 8.
You should be greeted to navigate on your own or use some sample data.
Mind Kibana sometimes takes a while to load, not much but it may take from a few seconds to a couple of minutes.
Flaws on this setup.
The first one is obvious. These 3 pieces are often setup in a cluster, one tool on one node. This said if your needs are not heavy there is no reason to cluster. Easier maintenance and setup. However if there’s a need to scale up a cluster will probably make more sense.
Secondly this is the OSS implementation of the ELK stack. This lacks for example TLS connections and you may want that so no one can get your password when looking at your gatherings. It can be done following the elastic.co documentation. But to be honest, that’s a royal pain in the rear end down the spine. For quite some time people have set up an NGINX as a reverse proxy, fitting encryption and so on.
In a separate piece I’ve written those security bits, setting a password, TLS connections, etc. That article will be available on May 12th 2020.
Third, this setup doesn’t talk about the transmission of logs using Beats to feed logstash. This will be tackled on a third article on the ELK stack at a later time.
If you want to have a script that builds all you’ve read here so far please visit my github article for this piece.
If you find the articles in Adminbyaccident.com useful to you, please consider making a donation.
Use this link to get $200 credit at DigitalOcean and support Adminbyaccident.com costs.
Get $100 credit for free at Vultr using this link and support Adminbyaccident.com costs.
Mind Vultr supports FreeBSD on their VPS offer.