Nessus is a professional vulnerability scanner from the reputable cybersecurity company Tenable. I have already written about it in the past but installing it on a GNU/Linux distro. This very article will guide anyone to install Nessus 10 on FreeBSD, since Tenable is releasing binaries for FreeBSD 11 and 12 as of the time of writing. Of course, anyone can use a free version although lacking many of the professional features the fully fledge license has to offer. The issue can be “easily” solved by just having a big pocket.
If you find the articles in Adminbyaccident.com useful to you, please consider making a donation.
Use this link to get $200 credit at DigitalOcean and support Adminbyaccident.com costs.
Get $100 credit for free at Vultr using this link and support Adminbyaccident.com costs.
Mind Vultr supports FreeBSD on their VPS offer.
Pre-requisites
- A FreeBSD 12 system on its latest iteration. Link to download such iso.
- The downloadable URL for the Nessus .txz file available.
- An email to get the personal use and free cost license.
In the following steps we will download the .txz file from Tenable containing the address and instructions to download and install Nessus 10.3. After that we will get a free license for Nessus Essentials. Finally we will install Nessus using such file and later on we will configure it to be used via browser.
Step 1.- Download the Nessus .txz file from Tenable.
Grab your favorite browser and just visit the following link.
https://www.tenable.com/downloads/nessus?loginAttempted=true
Once the page has loaded just look for the FreeBSD entry. There are two at the time of writing. Grab the one that matches your FreeBSD version. I’m taking the version for FreeBSD 12.
Click on the downwards arrow to download the file.

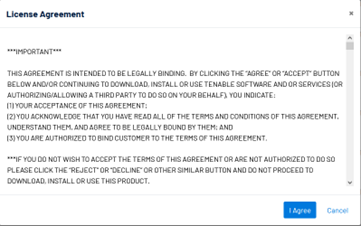
A license agreement will be displayed. Read it. If you don’t agree there’s no need to follow reading this guide. If you agree to the terms just follow up.
Now we have the file we can move on to the next step and place it into the FreeBSD server we want to install Nessus in.
Step 2.- Upload the installation file into the FreeBSD system.
As silly as it sounds, since you may be very well versed with scp or Filezilla some people just don’t, we will need to upload this .txz file into the server we want to install Nessus in.
Filezilla is a GUI tool that is present in Windows, macOS, GNU/Linux distros and FreeBSD as well. It will help us copying the file from the workstation we’ve used to download the file into the server.
For anyone not knowing how to connect to a server using Filezilla I just recommend searching with your favorite internet search engine or use the following link. This other video link to a YouTube tutorial will may be of help.
In the image below you can see I have already copied the Nessus installation file from my workstation (pane on the left) to the BSD server I want to install the software in (pane on the right).
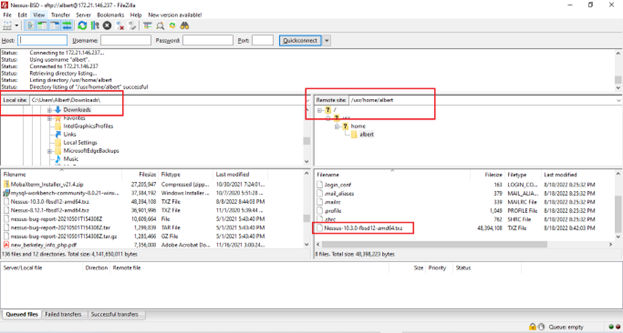
Now the Nessus-10.3.0-fbsd12-amd64.txz file is on the FreeBSD server we want to install Nessus in it’s time to login into the server and perform the install.
Step 3.- Install Nessus on FreeBSD 12
Now we have the install file on the server, the Nessus installation process in FreeBSD is pretty simple. Just type as follows with admin rights or as the root user.
albert@Nessus-BSD:~ $ sudo pkg install Nessus-10.3.0-fbsd12-amd64.txz
Updating FreeBSD repository catalogue...
FreeBSD repository is up to date.
All repositories are up to date.
Checking integrity... done (0 conflicting)
The following 1 package(s) will be affected (of 0 checked):
New packages to be INSTALLED:
Nessus: 10.3.0
Number of packages to be installed: 1
The process will require 75 MiB more space.
Proceed with this action? [y/N]: y
[1/1] Installing Nessus-10.3.0...
Extracting Nessus-10.3.0: 100%
Unpacking Nessus Core Components...
- You can start nessusd by typing /usr/sbin/service nessusd start
- Then go to https://Nessus-BSD:8834/ to configure your scanner
albert@Nessus-BSD:~ $
We will add the nessusd service entry into the /etc/rc.conf file so every time this server is booted the Nessus service will be up and running.
albert@Nessus-BSD:~ $ sudo sysrc nessusd_enable="YES"
nessusd_enable: -> YES
albert@Nessus-BSD:~ $
Check the servce status. It should not be running at this stage.
albert@Nessus-BSD:~ $ sudo service nessusd status
Nessus is not running
albert@Nessus-BSD:~ $
Fire it up now.
albert@Nessus-BSD:~ $ sudo service nessusd start
Starting Nessus...
albert@Nessus-BSD:~ $ Cached 0 plugin libs in 0msec
Cached 0 plugin libs in 0msec
sudo service nessusd status
Nessus is running
albert@Nessus-BSD:~ $
We double check it’s running by issuing this next command.
albert@Nessus-BSD:~ $ ps aux | grep nessusd
root 924 89.7 0.9 57588 38972 0 S 20:43 0:09.61 nessusd -q
albert 934 0.0 0.0 532 344 0 R+ 20:43 0:00.00 grep nessusd
albert@Nessus-BSD:~ $
And indeed, the nessusd service is running as root with PID 924.
Now we have installed Nessus on FreeBSD it’s time to move on into configuring it. Before we do so though, we will get a free license first.
Step 4.- Get a free Nessus Essentials license.
This is a must to use Nessus and it has no cost. The license is limited to the capabilities offered by Tenable in the Nessus Essentials features offering. Limited to be used against 16 local IPs. Enough for training or small lab use.
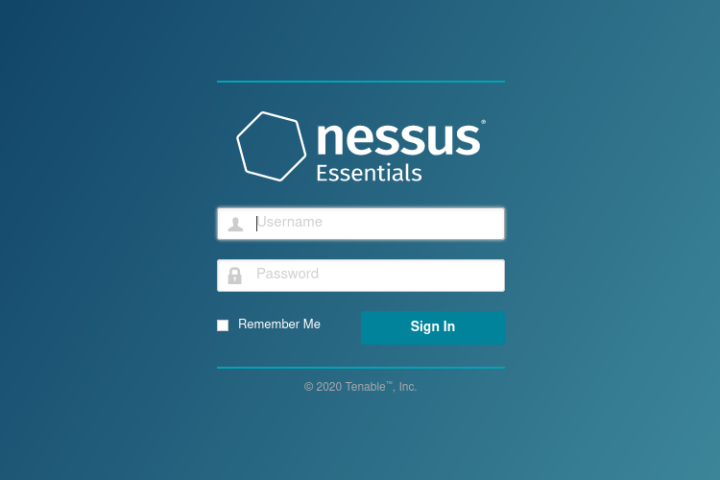
To get the license for Nessus Essentials we need to fill a form on their website or use the dialog in the browser if we visit the URL formed by our server’s IP + port 8834. Mine is set to this:
Your server’s IP will be different than this, but the default port as mentioned before is 8834.
Tip: Be very careful if you plan to expose this server into the wild internet when using a virtual machine on any hosting platform. As much as the connection is encrypted with TLS certificates, and the service is protected with username and password, there are chances of an unauthorized access to critical and most confidential information, such as vulnerabilities from your network or devices discovered by Nessus. Limit the access from specific IPs control or set up some complementary security measures to avoid unwanted access.
If you choose the Nessus URL, you will be asked for similar information, such as name, surname and email address.
Use this link below from Tenable to get the free activation code for the Nessus Essentials license.
https://www.tenable.com/products/nessus/activation-code
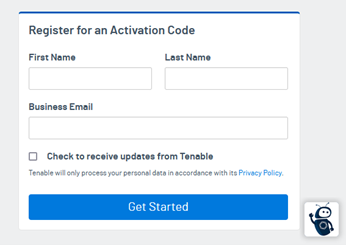
Once you’ve filled such information you will get an email to the address you’ve given Tenable a similar email as this below with your unique activation code.
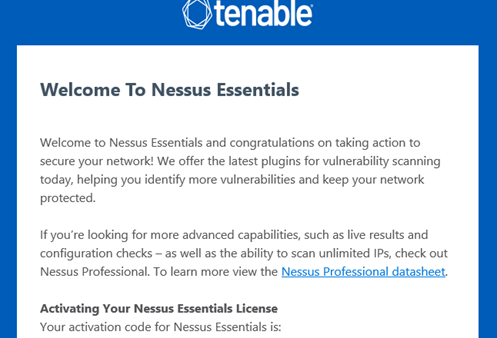
With your activation code in your email inbox, it’s time to finish the Nessus install on FreeBSD and configure it via browser.
Step 5.- Install Nessus on FreeBSD via browser.
In this step we will finish up the Nessus installation process and add the activation code. This will allow Nessus to download and configure the necessary plugins for it to be fully operational.
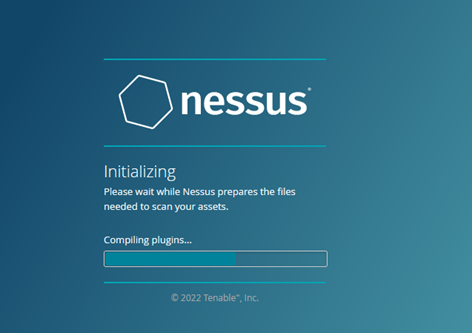
Once Nessus Essentials has finished installing, we will be welcomed by a prompt as follows.
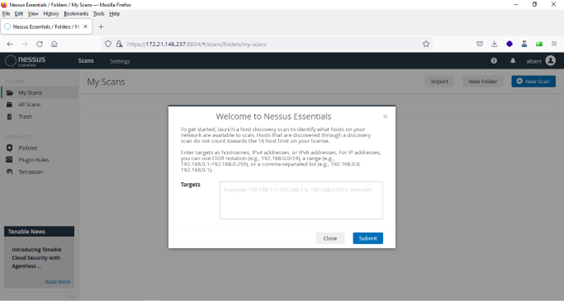
Now the install Nessus on FreeBSD process has finished it is time to test out the tool.
Step 6.- Test Nessus on FreeBSD. (Optional)
Testing the just installed tools it’s always fun and a good learning experience. If you already know Nessus and do not want to loose one of those limited 16 targets in the Nessus Essentials license, skip this step all together. If you have never used this tool it may be a good idea to keep reading.
There are some vulnerable sites on the internet set as dedicated targets to test security solutions and skills for cyber security individuals. One of those URLs is demo.testfire.net. You can use it as a testing target.
However, there is a caveat. Nessus will not be able to parse this URL as a target. Instead it will ask for an IP address. That’s simple to solve by using the host command as follows.
albert@Nessus-BSD:~ $ host demo.testfire.net
demo.testfire.net has address 65.61.137.117
albert@Nessus-BSD:~ $
We will then use the resolved IP as a target for our scan.
Note: Make sure you use the host command and resolve an IP address so the target you are scanning is a valid one and not someone else’s IP not intended for testing/demo purposes. You may get in trouble by not doing this properly.
Conclusion
Nessus is a great enterprise-grade vulnerability scanner already featured here at adminbyaccident. It’s also nice they are providing installers for FreeBSD and I encourage anyone willing to scan their own assets to use the tool on FreeBSD. As you’ve seen it is very easy to install Nessus 10 on FreeBSD, so don’t hesitate.
If you find the articles in Adminbyaccident.com useful to you, please consider making a donation.
Use this link to get $200 credit at DigitalOcean and support Adminbyaccident.com costs.
Get $100 credit for free at Vultr using this link and support Adminbyaccident.com costs.
Mind Vultr supports FreeBSD on their VPS offer.