Working with Nessus scan results is easy. How do I know that? Because I’ve worked with this tool for some time and although I do not know every corner of the things I’ve been doing some scans and solving quite a few deffects on systems that were labeled as ‘production ready’ when they clearly weren’t.
Nessus is a powerful tool and has some niceties, even in the community edition where one can scan lots of different types of systems with the help of plugins. As I showed in the introduction article about Nessus, there are three dedicated plugins to Windows, and the bigger one scans for more than 4500 items. So we can check from Windows vulnerabilities, to web server configurations, through networking gear assessments for F5 or Cisco equipment. Databases? Yes. Different services like DNS, FTP, SNMP, SMTP? Yes. Different UNIX or Linux systems scans? Yes, those too. Even SCADA systems have a plugin to be scanned with.
If you find the articles in Adminbyaccident.com useful to you, please consider making a donation.
Use this link to get $200 credit at DigitalOcean and support Adminbyaccident.com costs.
Get $100 credit for free at Vultr using this link and support Adminbyaccident.com costs.
Mind Vultr supports FreeBSD on their VPS offer.
But this article is a how to work with Nessus scan results, so I have already scanned two boxes, which were massively outdated on purpose so I could collect lots of output and deal with a few bits of it for the sake of demonstration.
Graphical views
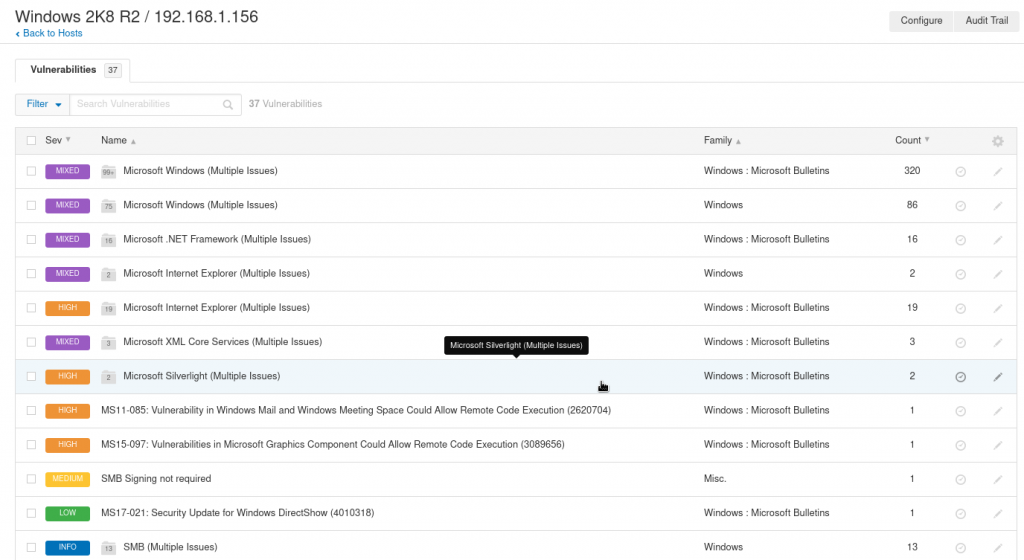
This is the view after scanning an outdated Windows 2008 R2 server. It’s not just outdated but out of support since January 14th this year (if you haven’t noticed you are in trouble).
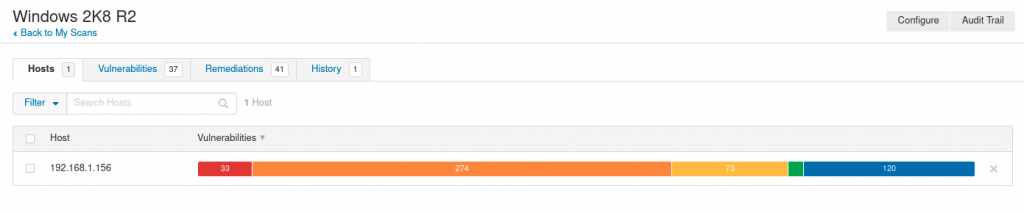
As seen on the very top picture among of all the types of issues found in this example scan, the first 320 ones are related to missing updates.
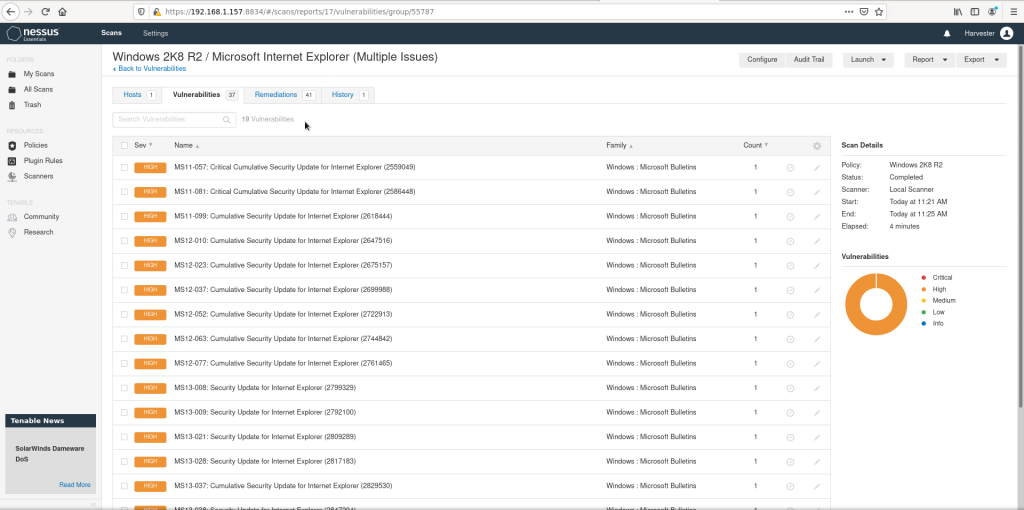
If we check the critical ones we’ll see this:
And if we get into one specific we’ll get this view:
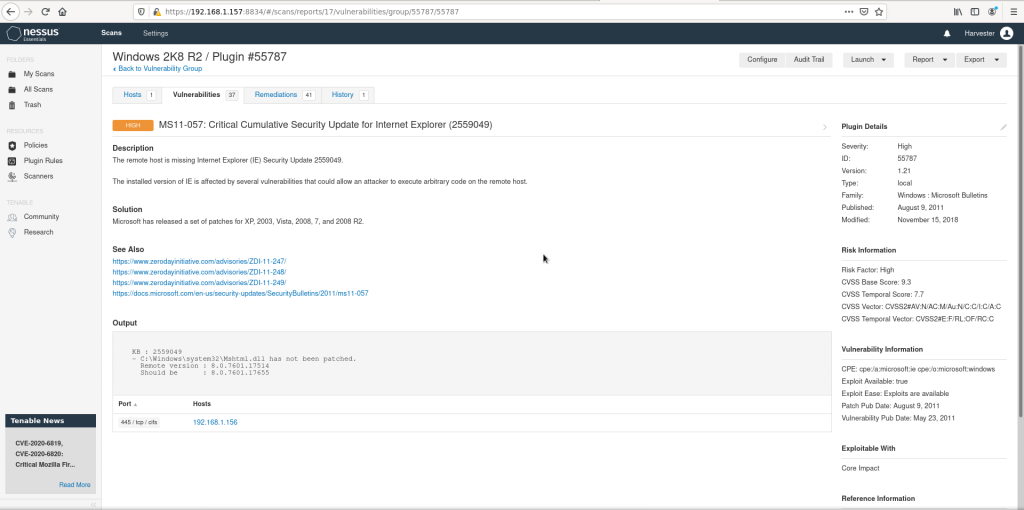
All sort of nice details appear on the UI, from the original description from the vendor, the original advisory URL and some references from others, to a very well detailed risk information on the right.
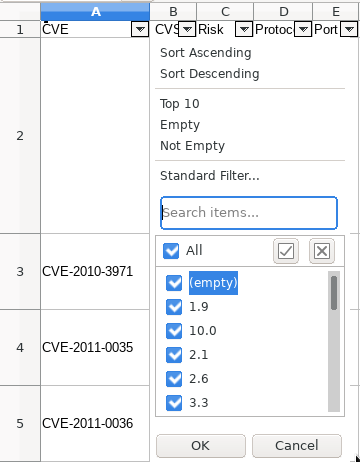
Using the CSV report files
One can use the UI to check the vulnerabilities and details but on the right corner of the screen there is a ‘Report’ button. Which can be more convenient for auditing purposes on medium sized to large environments. Although the UI is very easy to use and quite explanatory of the issues found on systems, once the scan includes lots of issues and just more than one box, losing track is very easy. So reports can be easier to handle for scale. The options for reports are CSV file and html. If the CSV option is selected a dialog pops up and a series of options are displayed so the report can be customizable. Mine resulted as this attached Windows_2K8_R2_vulns file. I have converted it to Excel format so you do not need to fight with converting it or similar.
When opening that file one can be overwhelmed but mind you can select what you can act on. For example if one wishes to just patch vulnerabilities from a certain level to the top, say just ‘high’ and ‘critical’ rated (beyond 7.0 in the CVSS3 scale), one selects those only and the scope is dramatically reduced.
Very interestingly the CVS file can include, and I’d recommend doing so, three columns a security analyst, pentester or auditor may find helpful. These are: ‘Synopsis’, ‘Description’ and ‘Solution’.

The issues are not just detected, evaluated with the CVSS3 scale, identified with the correspondent CVE number but an explanation is also included and more importantly some sort of solution as well. On outdated systems one can typically solve most of the more relevant issues (and the rest of many CVEs) just by patching.
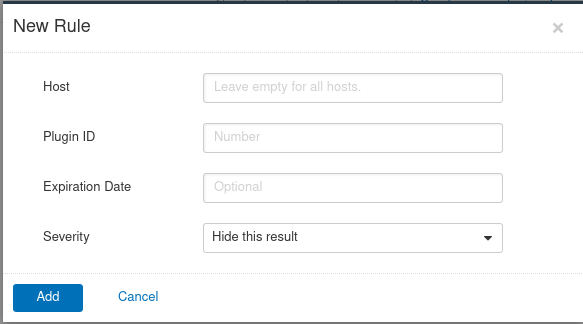
Setting exceptions for assumed (unresolvable) issues
However there are cases where the systems have been configured supporting old SSL cypher suites since the applications running or interacting with the systems do not support modern ones. This can be an issue but in some environments one just has to run with it. Nessus does even include rules for plugins and in this case the action would be pretty simple. Identify all the hosts with that sort of issue, search for the ‘offending’ plugin, place an expiration date (typically after these boxes are decomissioned) and just place ‘Hide this result’ configuration. This way this assumed risks won’t appear again the results.
I wouldn’t recommend this type of activity since one can end up assuming too much issues but this can be helpful when an upgrade of the environment is already on the works and there will be a date when these boxes are no longer under production. Other times it’s as simple as the environment is almost if not totally disconnected from the internet and even outer networks within the company.
Pay attention to the ‘Metasploit’ column
If you haven’t heard of the term ‘metasploit’ you are probably not well versed into security matters, although many sysadmins have heard of it. This is a tool from a security services company that collects exploits to known vulnerabilities. This eases the work of security personnel, specially pentesters and auditors. But not only them but the overall company’s security.
Nessus scan results in the CSV file format can include the ‘Metasploit’ column with a ‘yes’ or a ‘no’. If there is an exploit already available it will say yes. And that should warn anyone about how much easier to exploit a known vulnerability is and this should concern any analyst or sysadmin. Their systems may be inwards of a fenced network but any intruder already inside could greatly benefit from such available tools.
The MSKB column on the CSV report
This is as easy as easy can get. As detailed in my article on Microsoft’s Patch Day for April 2020, having a good idea of what to patch, what patches (Kbs on Microsoft’s parlance) cover which vulnerabilities is crucial. This MSKB column includes the patches that solved the listed vulnerability in the report.
Easy tricks
There is no mistery on how to use Nessus but making out the most of it takes time, resolution, thoughtful processing and time. Knowing the environment makes the difference between a decent job from an excellent one. Many times this is not easy, nor possible. Don’t lose track and deal with it.
This said organizing the types of scans as well as the scope is crucial for later processing. Nessus scan results, as you see here, can be big and difficult to process, when they in fact aren’t that much troubling.
– Organize your scan policies under a few paradigms. Don’t overdo that, but choose a manageable amount of them that cover enough ground and methods. Those can be, operating system types, applications, services, environments, countries, types of scan (white box, black box,…), anything useful to you.
– Organize the scope accordingly. You may have an activity calendar in your department, but others do have those too. Auditing systems can cause some stress to already under preassure boxes and cause sparks between people from different departments, or even customers. The scope of the scans does not just related to time, but to environments, countries, but often times this will be driven by organizational aspects rather than purely technical ones.
– Report, and of course, patch regularly and you won’t be drawn on a sea of CVEs, patches, issues, data, an lots of big, complicated spreadsheets.
– Know your environment. Don’t have a scan policy for F5 network equipment, or include the plugin to it to your generic defined ‘Network scan’ policy if your organization does not own such devices. Scans will take longer and devices will be scanned for issues that do not exist on them!
– Be wary with the credentials you are using for the ‘White box’ scans. Having a domain user to log into the systems and perform the scans is much safer than having local users. This is a no brainer any medium to large, to internationally huge company should be already doing. However such users are not often deactivated when scans are not needed. Or there is one big, powerful user, that can literally log in to anything. With hundreds or thousands of devices it may be wise to have a few dedicated users for such activity. Just imagine if an attacker could get their hands on one of those ‘unrestricted’ permissions to read users.
– Write down and revisit from time to time what you have exclused as issues in the past. This way you will track the severe but unresolvable issues of your environment. Basically don’t hide the shit under the carpet, make it hit the fan from time to time. Corpses inside cupboards end up smelling bad. All day.
Conclusion
Working with the right strategy with Nessus scan results can help a lot to security teams, and to administrators alike, in order to achieve the goal of running with lots of nines in the continuity realm but doing it safely too.
If you find the articles in Adminbyaccident.com useful to you, please consider making a donation.
Use this link to get $200 credit at DigitalOcean and support Adminbyaccident.com costs.
Get $100 credit for free at Vultr using this link and support Adminbyaccident.com costs.
Mind Vultr supports FreeBSD on their VPS offer.