On a recent post I published about how to install an OSSEC server on Ubuntu I explained how this solution can help secure an infrastructure by deploying agents which report back to a central server. This is the second part of this server-client story.
On this guide you will read about setting up agents and keys on the server side and how to install the agents on the client machines. Since Windows is the typical deployment this is what is going to be covered here. Don’t get confused though, OSSEC will help you protect workstations but servers are the target this tool can help a lot on.
If you find the articles in Adminbyaccident.com useful to you, please consider making a donation.
Use this link to get $200 credit at DigitalOcean and support Adminbyaccident.com costs.
Get $100 credit for free at Vultr using this link and support Adminbyaccident.com costs.
Mind Vultr supports FreeBSD on their VPS offer.
We’ll start on the server side. We’ll create an agent, get the keys for it and an ID will be assigned to it. That information will be later used on the client box. We’ll use a Windows 10 as the client but any servers will be very benefitted from this.
Server side.
Step one. First we need to get the server have an agent created.
$ sudo /var/ossec/bin/manage_agents
The above command will launch a menu like the following:
albert@ossecgui:~$ sudo /var/ossec/bin/manage_agents
****************************************
* OSSEC HIDS v3.6.0 Agent manager. *
* The following options are available: *
****************************************
(A)dd an agent (A).
(E)xtract key for an agent (E).
(L)ist already added agents (L).
(R)emove an agent (R).
(Q)uit.
Choose your action: A,E,L,R or Q:
We need to add an agent, so we’ll type ‘a’ and press enter.
After that we’ll be asked to set an agent name. I’d recommend you to use hostnames for that.
Choose your action: A,E,L,R or Q: a
- Adding a new agent (use '\q' to return to the main menu).
Please provide the following:
* A name for the new agent:
In my case I’ve chosen ‘Win-host’ but I’m sure if you’re deploying this in an office boxes can have really annoying names such as PBXNT64.
Next we’ll be asked for the agent’s IP. That is the IP address on the box we’re going to set the agent on. So you’d better have this beforehand.
- Adding a new agent (use '\q' to return to the main menu).
Please provide the following:
* A name for the new agent: Win-host
* The IP Address of the new agent:
Introduce the destination box address and press enter.
Now we are asked to introduce an ID number for that agent. Be smart and if you are deploying this on tenths, hundreds or thousands of boxes, and type this information on at least a spreadsheet. A CMDB would be so cool instead of an always changing spreadsheet no one knows where to write things on.
- Adding a new agent (use '\q' to return to the main menu).
Please provide the following:
* A name for the new agent: Win-host
* The IP Address of the new agent: 192.168.1.100
* An ID for the new agent[001]:
I selected 001 since this is just an example. But use numbers.
Afterthat a summary of the about to be created agent pops up.
Agent information:
ID:001
Name:Win-host
IP Address:192.168.1.100
Confirm adding it?(y/n):
Confirm this (if you see this fits to you) and write down this information.
Step two. Now we have set an agent we need to get a key. We’ll get one if pressing ‘e’.
****************************************
* OSSEC HIDS v3.6.0 Agent manager. *
* The following options are available: *
****************************************
(A)dd an agent (A).
(E)xtract key for an agent (E).
(L)ist already added agents (L).
(R)emove an agent (R).
(Q)uit.
Choose your action: A,E,L,R or Q: e
We’ll be told what agents are available and to provide an ID to get the keys.
Available agents:
ID: 001, Name: Win-host, IP: 192.168.1.100
Provide the ID of the agent to extract the key (or '\q' to quit): 001
I only have one agent available, the 001, and I want the key for it. I type the ID number and voilá:
Provide the ID of the agent to extract the key (or '\q' to quit): 001
Agent key information for '001' is:
MDAxIFdpbi1ob3N0IDE5Mi4xNLNwvMS4xMDAgNTExMmM0ZMwf522E2N2M4ZGUyYWIzYjhiNagqp56qeBBWer3NDAzODk2NGU0MmI0NWE3MzgwMDJlNDcxNjBhZQ==
** Press ENTER to return to the main menu.
Store this key alongside the ID number and the agent name. We’ll use this on the client box in a minute.
We have set an agent, created a key related to it and now we’ll go to the client box and set up the agent installation.
Client side.
Step one. Go to the internet and grab the OSSEC agent binary for your OS. I’ll be setting this on Windows. Again, this is a manual install for just one box. You can do a handful of this by hand but on tenths, hundreds or thousands of boxes I’m pretty sure you already have some sort of SCCM software or the like.
URL for the binary download: https://www.ossec.net/downloads/
Step two. Double-click on the .exe file and start installing the agent.
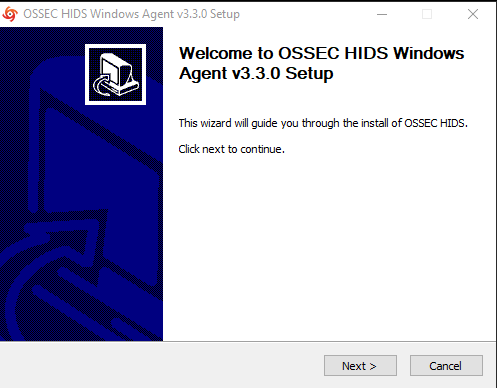
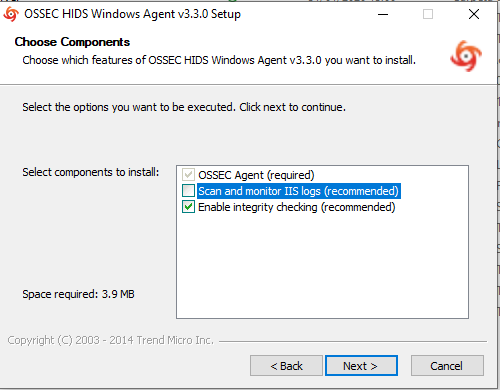
Click on ‘Next’ and follow the instructions. I will not detail all of the steps (I assume everyone has some Windows experience) but I’ll just point out there is one step where you will be asked to monitor IIS logs, and although they recommend to do so, if it’s not enabled on your system, uncheck that box.
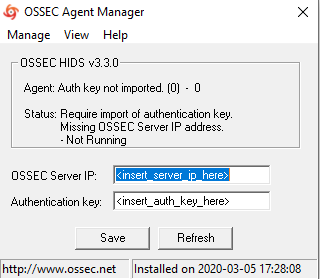
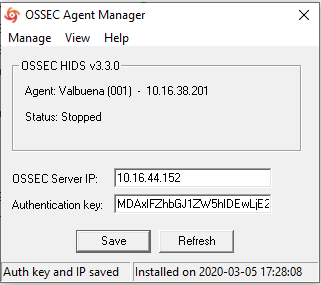
At the end you’ll need to introduce the server’s ip and the key you’ve previously generated.
Now click on ‘Manage’ and start the agent.
To avoid any issues with connectivity just make sure the server side has the right ports open.
Server side.
Firewall checking is necessary to ensure connectivity between the server and the agents. Needed ports are 514 for syslog and 1514/udp for agents communication with the server. As an example:
albert@ossecgui:~$ sudo ufw status
Status: active
To Action From
-- ------ ----
22 ALLOW Anywhere
80 ALLOW Anywhere
514 ALLOW Anywhere
1514 ALLOW Anywhere
22 (v6) ALLOW Anywhere (v6)
80 (v6) ALLOW Anywhere (v6)
514 (v6) ALLOW Anywhere (v6)
1514 (v6) ALLOW Anywhere (v6)
albert@ossecgui:~$
That is from the firewall side but we need to see if there’s actual communication and if we haven’t chosen to install OSSEC-WUI on the server side (which I will not recommend installing because it’s deprecated), you can test this with the tcpdump command.
We launch the following command and wait a few seconds so communication between the server and the agent happens and it’s captured.
root@ossecgui:~# tcpdump -i enp0s3 -v src 192.168.1.100 >> /var/log/albert.collect
tcpdump: listening on enp0s3, link-type EN10MB (Ethernet), capture size 262144 bytes
^C28 packets captured
35 packets received by filter
0 packets dropped by kernel
root@ossecgui:~#
After a few seconds we can check the 28 captured packets.
root@ossecgui:~# cat /var/log/albert.collect
20:50:11.335414 IP (tos 0x0, ttl 1, id 26943, offset 0, flags [none], proto IGMP (2), length 32, options (RA))
192.168.1.100 > 239.255.255.250: igmp v2 report 239.255.255.250
20:50:20.736865 IP (tos 0x0, ttl 128, id 8869, offset 0, flags [none], proto UDP (17), length 213)
192.168.1.100.64402 > ossecgui.1514: UDP, length 185
20:50:20.741986 IP (tos 0x0, ttl 128, id 8870, offset 0, flags [none], proto UDP (17), length 213)
192.168.1.100.64402 > ossecgui.1514: UDP, length 185
As you can see communication between the agent and the server is taking place through port 1514 on the server side which is the right one.
So this is it for how to install OSSEC agents on Windows boxes. Hope this has helped you out. On another article I’ll try to show a few configuration details, since this tool is quite complete and complexity always needs some tunning to avoid unnecessary alerts, false positives, etc.
If you find the articles in Adminbyaccident.com useful to you, please consider making a donation.
Use this link to get $200 credit at DigitalOcean and support Adminbyaccident.com costs.
Get $100 credit for free at Vultr using this link and support Adminbyaccident.com costs.
Mind Vultr supports FreeBSD on their VPS offer.
.