As we all know a best practice recommendation that has been made forever, and forever many are just skipping, is running up to date software and it is one of the core fundamentals of IT. If you happen to use MariaDB on FreeBSD, the official guide on their website may not be that all helpful since most instructions are referred to GNU/Linux users. So here comes my very simple, limited but I hope useful for some FreeBSD users, how to upgrade MariaDB on FreeBSD guide.
If you find the articles in Adminbyaccident.com useful to you, please consider making a donation.
Use this link to get $200 credit at DigitalOcean and support Adminbyaccident.com costs.
Get $100 credit for free at Vultr using this link and support Adminbyaccident.com costs.
Mind Vultr supports FreeBSD on their VPS offer.
As a good sysadmin of your boxes you update their running software regularly, sometimes even in a scheduled fashion. And you do this with your FAMP systems, which probably, maybe not, use MariaDB as the database. MySQL will surely behave the exact same. You grab the keyboard and run a very simple ‘sudo pkg upgrade’ followed by a ‘y’ confirmation if you hadn’t added it previously. You’ll do something similar to this:
The following 10 package(s) will be affected (of 0 checked):
Installed packages to be UPGRADED:
vim-console: 8.2.0076 -> 8.2.0205
sudo: 1.8.30 -> 1.8.31
py27-cffi: 1.13.2 -> 1.14.0
py27-Babel: 2.7.0 -> 2.8.0
p5-DBI: 1.642 -> 1.643
openldap-client: 2.4.48 -> 2.4.49
mariadb103-server: 10.3.21 -> 10.3.22
mariadb103-client: 10.3.21 -> 10.3.22
e2fsprogs: 1.45.5 -> 1.45.5_3
Installed packages to be REINSTALLED:
libgpg-error-1.36 (option added: TEST)
Number of packages to be upgraded: 9
Number of packages to be reinstalled: 1
The process will require 2 MiB more space.
46 MiB to be downloaded.
Proceed with this action? [y/N]: y
And after downloading the packages and installing the software a message from MariaDB gets displayed and reads like follows:
Remember to run mysql_upgrade (with the optional --datadir=<dbdir> flag)
the first time you start the MySQL server after an upgrade from an
earlier version.
A similar message appears on MySQL too:
Message from mysql80-server-8.0.19_1:
--
Remember to run mysql_upgrade the first time you start the MySQL server
after an upgrade from an earlier version.
So, as we all know, after an upgrade we need to restart the services affected by updates for those to be applied. If not we will have, running, in memory, the outdated version. Plan ‘downtime’ and/or ‘service degradation’ accordingly to your needs. Doing this, without taking in consideration the above mention paragraph, will probably not cause issues between minor versions, let’s say from version 10.2.29 to 10.2.30. It may not happen from 10.2 to 10.3 either but why not having it properly checked. Let’s get our hands dirty.
First we can check the state of our MariaDB database with the ‘mysqlcheck’ command. We can choose various operations. To make it quick we can check all the databases and then check the version we are running.
Launch the following command and you’ll see a giant amount of content. Redirect output to a file and read it (process it with grep, awk or any tool you have available) afterwards if there are more than three DB’s running here.
root@Collegats:~ # mysqlcheck -u root -p --all-databases
To be happy you should get a long list of items with an OK flag at the end of each line. Smile.
Now that all the databases have been checked and are out of issues we can check the version in use with the following command:
root@Collegats:~ # mysqlcheck -u root -p –version
We will get something similar to this, and obviously version in question will be different for you quite probably.
root@Collegats:~ # mysqlcheck -u root -p --version
mysqlcheck Ver 2.7.4-MariaDB Distrib 10.2.30-MariaDB, for FreeBSD12.0 (amd64)
root@Collegats:~ #
It also works on a MySQL equipped box:
$ mysqlcheck -u root -p --version
mysqlcheck Ver 8.0.19 for FreeBSD12.0 on amd64 (Source distribution)
$
Before committing the upgrade yet, let’s remember another fundamental. Backup. Now. Take your time, you have it. And you have it because you bloody need it.
In here we will show the upgrade process from a minor version to another minor version point of view first but the main concepts apply for a major upgrade. As always you are acting on your own risk and I, nor this article, will be held responsible for any data loss or problems arised from using the same procedure/s. You’ve been warned.
If we go by the playbook we have to stop the database service before moving ahead.
root@Collegats:~ # mysql-server stop
Now check it has been stopped.
root@Collegats:~ # mysql-server status
Alternatively you can check if there is any mysql running process by issuing the following command.
root@Collegats:~ # ps aux | grep mysql
And no process should appear. In case there is one wait a couple of minutes and give it a try. If something is stucked there are two bad solutions. First, wait. Second, kill the process. Choose the poison. Remember backup?
Once the mysql-server service is stopped we can proceed with the upgrade. I typically, and something I will recommend until I say the contrary, is to just go ahead and launch the pkg command without uninstalling the existing version. However I’d uninstall the existing version if the upgrade was performed from a major version to another.
root@Collegats:~ # pkg upgrade -y mariadb102-server mariadb102-client
The newest minor version will be fetched and installed. Once that process has finished we need to fire up the mysql-server process back again.
root@Collegats:~ # mysql-server start
Check it’s up and running.
root@Collegats:~ # mysql-server status
This should have made it. However… what about the information message about mysql_upgrade… Yes, this one:
Remember to run mysql_upgrade (with the optional --datadir=<dbdir> flag)
the first time you start the MySQL server after an upgrade from an
earlier version.
Let’s play this. This ‘mysql_upgrade’ command is a tool that checks and updates your tables to the latest version. These are not my words but an official documentation statement. I think this is a very recommendable process to do after any update and specially for major upgrades since it will make the necessary checks and fixes to our databases, tables, etc so errors are found, corrected and we can continue in our endless labour of tasting different selections of machine coffee.
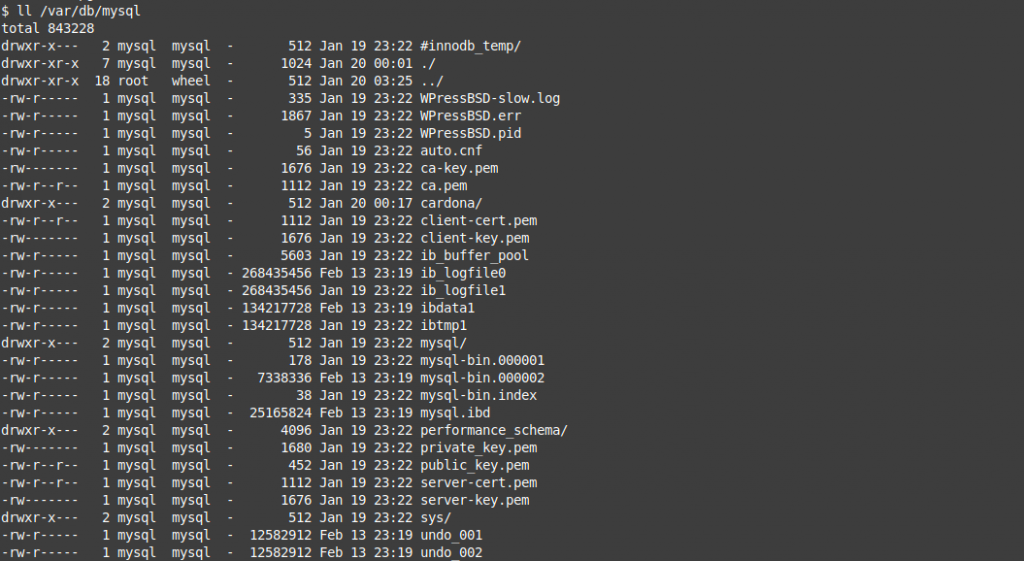
Before launching the command we need to know our ‘datadir’ path. If you’ve never touched this parameter it will more than probably be found in /var/db/mysql on FreeBSD.
Warning. The usual path on Linux is not the same and is /var/lib/mysql. So be careful when following GNU/Linux guides on BSD systems.
Tips… to find the datadir path when not knowing, not remembering, having lost the documentation that was never written.
Look for the my.cnf file. If it exists it is typically found under the /usr/local/etc/ directory or thereabout. In that file the datadir path can be declared. However MariaDB deprecated the use of the my.cnf file on the default install, although one can be added as this documentation explains.
Another simple, dumb, yet effective way to find out the datadir path is just firing up a simple ps command as this:
root@Collegats:~ # ps aux | grep mysql
The output should look like a lot to this one:
root@Collegats:~ # ps aux | grep mysql
mysql 65140 0,0 0,3 11972 2536 - Is 20:16 0:00,02 /bin/sh /usr/local/bin/mysqld_safe --defaults-extra-file=/var/db/mysql/my.cnf --user=mysql --datadir=/var/db/mysql --pid-file=/var/db/mysql/Collegats.pid
mysql 65208 0,0 9,0 540212 90504 - I 20:16 0:00,59 /usr/local/libexec/mysqld --defaults-extra-file=/var/db/mysql/my.cnf --basedir=/usr/local --datadir=/var/db/mysql --plugin-dir=/usr/local/lib/mysql/plugin --log-error=/v
root 65212 0,0 0,0 524 320 0 R+ 20:17 0:00,00 grep mysql
root@Collegats:~ #
As you can see the ‘–datadir=/var…’ bit on both MySQL processes reveal it. Now you now it.
Once we now the datadir location we can make use of the mysql_upgrade command. When doing so it will run a seven step process.
Phase 1/7: Checking and upgrading mysql database.
Phase 2/7: Installing used storage engines...
Phase 3/7: Fixing views
Phase 4/7: Running 'mysql_fix_privilege_tables'
Phase 5/7: Fixing table and database names
Phase 6/7: Checking and upgrading tables
Phase 7/7: Running 'FLUSH PRIVILEGES'
You can use the following command to get this process done.
root@Collegats:~ # mysql_upgrade -u root -p –datadir=/var/db/mysql
As an example output you shall get something close to:
root@Collegats:~ # mysql_upgrade -u root -p --datadir=/var/db/mysql
mysql_upgrade: the '--datadir' option is always ignored
Enter password:
Looking for 'mysql' as: mysql
Looking for 'mysqlcheck' as: mysqlcheck
Phase 1/7: Checking and upgrading mysql database
Processing databases
mysql
mysql.column_stats OK
mysql.columns_priv OK
mysql.db OK
mysql.event OK
mysql.func OK
mysql.gtid_slave_pos OK
mysql.help_category OK
mysql.help_keyword OK
mysql.help_relation OK
mysql.help_topic OK
mysql.host OK
mysql.index_stats OK
mysql.innodb_index_stats OK
mysql.innodb_table_stats OK
mysql.plugin OK
mysql.proc OK
mysql.procs_priv OK
mysql.proxies_priv OK
mysql.roles_mapping OK
mysql.servers OK
mysql.table_stats OK
mysql.tables_priv OK
mysql.time_zone OK
mysql.time_zone_leap_second OK
mysql.time_zone_name OK
mysql.time_zone_transition OK
mysql.time_zone_transition_type OK
mysql.transaction_registry OK
mysql.user OK
Phase 2/7: Installing used storage engines... Skipped
Phase 3/7: Fixing views
Processing databases
giragonçadb
information_schema
mysql
performance_schema
Phase 4/7: Running 'mysql_fix_privilege_tables'
Phase 5/7: Fixing table and database names
Processing databases
giragonçadb
information_schema
mysql
performance_schema
Phase 6/7: Checking and upgrading tables
Processing databases
giragonçadb
giragonçadb.oc_accounts OK
giragonçadb.oc_activity OK
giragonçadb.oc_activity_mq OK
giragonçadb.oc_addressbookchanges OK
giragonçadb.oc_addressbooks OK
giragonçadb.oc_appconfig OK
giragonçadb.oc_authtoken OK
giragonçadb.oc_bruteforce_attempts OK
giragonçadb.oc_calendar_invitations OK
giragonçadb.oc_calendar_reminders OK
giragonçadb.oc_calendar_resources OK
giragonçadb.oc_calendar_resources_md OK
giragonçadb.oc_calendar_rooms OK
giragonçadb.oc_calendar_rooms_md OK
giragonçadb.oc_calendarchanges OK
giragonçadb.oc_calendarobjects OK
giragonçadb.oc_calendarobjects_props OK
giragonçadb.oc_calendars OK
giragonçadb.oc_calendarsubscriptions OK
giragonçadb.oc_cards OK
giragonçadb.oc_cards_properties OK
giragonçadb.oc_collres_accesscache OK
giragonçadb.oc_collres_collections OK
giragonçadb.oc_collres_resources OK
giragonçadb.oc_comments OK
giragonçadb.oc_comments_read_markers OK
giragonçadb.oc_credentials OK
giragonçadb.oc_dav_cal_proxy OK
giragonçadb.oc_dav_shares OK
giragonçadb.oc_direct_edit OK
giragonçadb.oc_directlink OK
giragonçadb.oc_federated_reshares OK
giragonçadb.oc_file_locks OK
giragonçadb.oc_filecache OK
giragonçadb.oc_filecache_extended OK
giragonçadb.oc_files_trash OK
giragonçadb.oc_flow_checks OK
giragonçadb.oc_flow_operations OK
giragonçadb.oc_flow_operations_scope OK
giragonçadb.oc_group_admin OK
giragonçadb.oc_group_user OK
giragonçadb.oc_groups OK
giragonçadb.oc_jobs OK
giragonçadb.oc_login_flow_v2 OK
giragonçadb.oc_migrations OK
giragonçadb.oc_mimetypes OK
giragonçadb.oc_mounts OK
giragonçadb.oc_notifications OK
giragonçadb.oc_notifications_pushtokens OK
giragonçadb.oc_oauth2_access_tokens OK
giragonçadb.oc_oauth2_clients OK
giragonçadb.oc_preferences OK
giragonçadb.oc_privacy_admins OK
giragonçadb.oc_properties OK
giragonçadb.oc_richdocuments_assets OK
giragonçadb.oc_richdocuments_direct OK
giragonçadb.oc_richdocuments_member OK
giragonçadb.oc_richdocuments_wopi OK
giragonçadb.oc_schedulingobjects OK
giragonçadb.oc_share OK
giragonçadb.oc_share_external OK
giragonçadb.oc_storages OK
giragonçadb.oc_systemtag OK
giragonçadb.oc_systemtag_group OK
giragonçadb.oc_systemtag_object_mapping OK
giragonçadb.oc_text_documents OK
giragonçadb.oc_text_sessions OK
giragonçadb.oc_text_steps OK
giragonçadb.oc_trusted_servers OK
giragonçadb.oc_twofactor_backupcodes OK
giragonçadb.oc_twofactor_providers OK
giragonçadb.oc_user_transfer_owner OK
giragonçadb.oc_users OK
giragonçadb.oc_vcategory OK
giragonçadb.oc_vcategory_to_object OK
giragonçadb.oc_whats_new OK
information_schema
performance_schema
Phase 7/7: Running 'FLUSH PRIVILEGES'
OK
root@Collegats:~ #
Once every step has been accomplished just check the output and look for any errors that may appear. There is no need to restart the mysql-server service because we are already running on the new binary and we have just made the checks and fixes for any issues on the databases.
This should be all for this how to upgrade MariaDB on FreeBSD. However MySQL does also exists and both still share a ton of code and concepts. However this same last command will not work the same on MySQL 8.0.
$ mysql_upgrade -u root -p --datadir=/var/db/mysql
Enter password:
mysql_upgrade: [ERROR] unknown variable 'datadir=/var/db/mysql'.
Upgrade process encountered error and will not continue.
$
When using something close but avoiding the –datadir bit:
$ mysql_upgrade -u root -p
Enter password:
The mysql_upgrade client is now deprecated. The actions executed by the upgrade client are now done by the server.
To upgrade, please start the new MySQL binary with the older data directory. Repairing user tables is done automatically. Restart is not required after upgrade.
The upgrade process automatically starts on running a new MySQL binary with an older data directory. To avoid accidental upgrades, please use the --upgrade=NONE option with the MySQL binary. The option --upgrade=FORCE is also provided to run the server upgrade sequence on demand.
It may be possible that the server upgrade fails due to a number of reasons. In that case, the upgrade sequence will run again during the next MySQL server start. If the server upgrade fails repeatedly, the server can be started with the --upgrade=MINIMAL option to start the server without executing the upgrade sequence, thus allowing users to manually rectify the problem.
$
Refer to MySQL documentation for this, but I am afraid this is as simple as checking the still present my.cnf on MySQL land and restart the service after the upgrade has been performed.
Finally, yes this how to upgrade MariaDB on FreeBSD thing can be declared finished. Somewhat…
If you find the articles in Adminbyaccident.com useful to you, please consider making a donation.
Use this link to get $200 credit at DigitalOcean and support Adminbyaccident.com costs.
Get $100 credit for free at Vultr using this link and support Adminbyaccident.com costs.
Mind Vultr supports FreeBSD on their VPS offer.