You can find information about how to install WordPress on FreeBSD somewhere else since there are many tutorials around explaining it. However I thought mine would be a bit more interesting to you. Read on.
As you should be aware (and hopefully you already are) installing WordPress requires a stack of other software. Typically you can read about the LAMP stack composed by the GNU/Linux operating system, the Apache web server, the MySQL (or derivatives) database and PHP for the scripting language. In this guide we’ll give the stack a little switch and we’ll use the FreeBSD operating system instead, and there we have the FAMP stack. You can follow the guide I’ve already written to get a nice, functional base for that.
If you find the articles in Adminbyaccident.com useful to you, please consider making a donation.
Use this link to get $200 credit at DigitalOcean and support Adminbyaccident.com costs.
Get $100 credit for free at Vultr using this link and support Adminbyaccident.com costs.
Mind Vultr supports FreeBSD on their VPS offer.
Before we get into this how to you may be wondering what are the differences in using one operating system or another. The main ones, I mean the relevant ones, are out of the scope of this guide. Both can perfectly deliver and perform excellently for a WordPress site purpose. Even a successful one. For this guide you may need to know a short collection of FreeBSD particularities.
To install WordPress on FreeBSD I will make use of one of my beloved tools you can find on FreeBSD and that is Jails. It doesn’t make any difference whether you do it on a straight OS install or if you use Jails. So bare with me.
You can skip the following steps if you’re not using jails. If you are a GNU/Linux user just imagine we’re doing some kind of docker thing here (although they are very different approaches). So I already have a FAMP stack jail ready and I will clone it. I have it as a base so I can work on new projects without wasting time repeating whole thing. I update the base from time to time which lasts a few seconds which is all the hassle this brings.
This is a shortened list of the jails I have on this VM (I have a second setup on bare metal sitting on a server).
albert@BSDVM:~ % sudo iocage list
+-----+--------------+-------+--------------+---------------+
| JID | NAME | STATE | RELEASE | IP4 |
+=====+==============+=======+==============+===============+
| - | article | down | 11.1-RELEASE | 192.168.1.200 |
+-----+--------------+-------+--------------+---------------+
| - | drupal | down | 11.1-RELEASE | 192.168.1.210 |
+-----+--------------+-------+--------------+---------------+
| - | modsec | down | 11.1-RELEASE | 192.168.1.202 |
+-----+--------------+-------+--------------+---------------+
| - | nagios | down | 11.1-RELEASE | 192.168.1.104 |
+-----+--------------+-------+--------------+---------------+
| - | nagios4 | down | 11.1-RELEASE | 192.168.1.106 |
+-----+--------------+-------+--------------+---------------+
| - | netdata | down | 11.1-RELEASE | 192.168.1.230 |
+-----+--------------+-------+--------------+---------------+
| - | standardfamp | down | 11.1-RELEASE | - |
+-----+--------------+-------+--------------+---------------+
albert@BSDVM:~ %
I clone the standardfamp jail and name it as wordpress. We’ll play with this last one.
albert@BSDVM:~ % sudo iocage clone standardfamp --name wptest
wptest successfully cloned!
albert@BSDVM:~ %
So if I list now my jails there you have it.
+-----+--------------+-------+--------------+---------------+
| - | netdata | down | 11.1-RELEASE | 192.168.1.230 |
+-----+--------------+-------+--------------+---------------+
| - | standardfamp | down | 11.1-RELEASE | - |
+-----+--------------+-------+--------------+---------------+
| - | wptest | down | 11.1-RELEASE | - |
+-----+--------------+-------+--------------+---------------+
albert@BSDVM:~ %
Let’s give it an ip, which it’s missing and we’ll need it to be connected to the network.
albert@BSDVM:~ % sudo iocage set ip4_addr="em0|192.168.1.242/24" wptest
Property: ip4_addr has been updated to em0|192.168.1.242/24
albert@BSDVM:~ %
We make sure this has worked.
albert@BSDVM:~ % sudo iocage get ip4_addr wptest
em0|192.168.1.242/24
albert@BSDVM:~ %
We now fire up the jail and get into it.
albert@BSDVM:~ % sudo iocage start wptest
* Starting wptest
+ Started OK
+ Starting services OK
albert@BSDVM:~ % sudo iocage console wptest
Last login: Wed Jan 3 18:21:41 on pts/1
FreeBSD 11.1-RELEASE-p10 (GENERIC) #0: Tue May 8 05:21:56 UTC 2018
Welcome to FreeBSD!
root@wptest:~ #
If you skipped the jails part you can regain track here. We already have our FAMP stack already built so we now go for our how to install WordPress on FreeBSD.
The first step to install WordPress on FreeBSD is creating a database into MariaDB (or MySQL) and a user. To start we have to log in to MariaDB as the root user. Whenever you installed MariaDB (or MySQL, Percona, etc) you set the root password, so go grab it. We first check if the database is running.
root@wptest:~ # ps aux | grep mysql
mysql 1209 0.0 0.0 13260 2032 - IsJ 13:19 0:00.02 /bin/sh /usr/local/bin/mysqld_safe --defaults-extra-file=/var/db/mysql/my.cnf --user=mysql --datadir=/var/db/mysql --pid-file=/var
mysql 1274 0.0 1.9 589712 79312 - IJ 13:19 0:00.47 /usr/local/libexec/mysqld --defaults-extra-file=/var/db/mysql/my.cnf --basedir=/usr/local --datadir=/var/db/mysql --plugin-dir=/us
root 1370 0.0 0.0 12780 1688 0 R+J 13:26 0:00.00 grep mysql
root@wptest:~ #
Indeed it is running. Let’s create the database. We have to log into MySQL (I chose MariaDB but it works across the board of derivatives).
root@wptest:~ # ps aux | grep mysql
mysql 1209 0.0 0.0 13260 2032 - IsJ 13:19 0:00.02 /bin/sh /usr/local/bin/mysqld_safe --defaults-extra-file=/var/db/mysql/my.cnf --user=mysql --datadir=/var/db/mysql --pid-file=/var
mysql 1274 0.0 1.9 589712 79312 - IJ 13:19 0:00.47 /usr/local/libexec/mysqld --defaults-extra-file=/var/db/mysql/my.cnf --basedir=/usr/local --datadir=/var/db/mysql --plugin-dir=/us
root 1370 0.0 0.0 12780 1688 0 R+J 13:26 0:00.00 grep mysql
root@wptest:~ #
root@wptest:~ # mysql -u root -p
Enter password:
Welcome to the MariaDB monitor. Commands end with ; or \g.
Your MariaDB connection id is 8
Server version: 10.2.11-MariaDB FreeBSD Ports
Copyright (c) 2000, 2017, Oracle, MariaDB Corporation Ab and others.
Type 'help;' or '\h' for help. Type '\c' to clear the current input statement.
MariaDB [(none)]>
Once we are in we will have to create a database to host the WordPress installation. We will set the database name as wordpress but for God’s sake don’t do that and thing of something smarter.
MariaDB [(none)]> CREATE DATABASE wptest;
Query OK, 1 row affected (0.00 sec)
MariaDB [(none)]>
After this we will create a new user and will give it rights to use the database we’ve just created.
MariaDB [(none)]> GRANT ALL PRIVILEGES ON wptest.* TO 'wpuser'@'localhost' IDENTIFIED BY 'wppasswd';
Query OK, 0 rows affected (0.00 sec)
MariaDB [(none)]>
As you can see the sentence includes giving the rights on the database as well as create the user on the local machine and giving it a password. Again don’t use this wording as example and find some interesting names and passwords for your use. These will be later used to connect the WordPress configuration file to connect with the database.
Let’s now reload the MariaDB internal caches by using the FLUSH command so all the changes get loaded. And then quit.
MariaDB [(none)]> FLUSH PRIVILEGES;
Query OK, 0 rows affected (0.00 sec)
MariaDB [(none)]> exit
Bye
root@wptest:~ #
On our FAMP we installed very basic PHP functionality. If we want WordPress to correctly work, or any other program sitting on top of the stack, we have to install the missing packages (the dependencies). We can first list what we already have installed and then look for the missing bits and act consequently.
This is what we have installed:
root@wptest:~ # pkg info | grep php
mod_php72-7.2.0_1 PHP Scripting Language
php72-7.2.0_1 PHP Scripting Language
php72-mysqli-7.2.0_1 The mysqli shared extension for php
root@wptest:~ #
WordPress needs the following PHP modules:
php72 PHP Scripting Language
mod_php72 The Apache shared extension for php
php72-bz2 The bz2 shared extension for php
php72-ctype The ctype shared extension for php
php72-curl The curl shared extension for php
php72-filter The filter shared extension for php
php72-gd The gd shared extension for php
php72-hash The hash shared extension for php
php72-json The json shared extension for php
php72-mbstring The mbstring shared extension for php
php72-pecl-mcrypt The mcrypt shared extension for php
php72-mysqli The mysqli shared extension for php
php72-openssl The openssl shared extension for php
php72-pdo The pdo shared extension for php
php72-pdo_mysql The pdo_mysql shared extension for php
php72-session The session shared extension for php
php72-tokenizer The tokenizer shared extension for php
php72-xml The xml shared extension for php
php72-zip The zip shared extension for php
php72-zlib The zlib shared extension for php
There are two ways to install these dependencies. You either install a meta package (php72-extensions) with most of them and then sort out which are the missing ones and install them or you install them one by one (or you make one big line and install them all together).
We go for the big one line:
sudo pkg install php72-bz2 php72-ctype php72-curl php72-filter php72-gd php72-hash php72-json php72-mbstring php72-pecl-mcrypt php72-mysqli php72-openssl php72-pdo php72-pdo_mysql php72-session php72-tokenizer php72-xml php72-zip php72-zlib
I do it in my jail:
root@wptest:~ # pkg install php72-bz2 php72-ctype php72-curl php72-filter php72-gd php72-hash php72-json php72-mbstring php72-pecl-mcrypt php72-openssl php72-pdo php72-pdo_mysql php72-session php72-tokenizer php72-xml php72-zip php72-zlib
Updating FreeBSD repository catalogue...
FreeBSD repository is up to date.
All repositories are up to date.
The following 39 package(s) will be affected (of 0 checked):
New packages to be INSTALLED:
php72-bz2: 7.2.5
php72-ctype: 7.2.5
php72-curl: 7.2.5
php72-filter: 7.2.5
php72-gd: 7.2.5
php72-hash: 7.2.5
php72-json: 7.2.5
php72-mbstring: 7.2.5
php72-pecl-mcrypt: 1.0.1
php72-openssl: 7.2.5
php72-pdo: 7.2.5
php72-pdo_mysql: 7.2.5
php72-session: 7.2.5
php72-tokenizer: 7.2.5
php72-xml: 7.2.5
php72-zip: 7.2.5
php72-zlib: 7.2.5
curl: 7.59.0
ca_root_nss: 3.37
libXpm: 3.5.12
xproto: 7.0.31
libXext: 1.3.3_1,1
xextproto: 7.3.0
libXau: 1.0.8_3
libX11: 1.6.5,1
libxcb: 1.12_2
libXdmcp: 1.1.2
libpthread-stubs: 0.4
kbproto: 1.0.7
libXt: 1.1.5,1
libSM: 1.2.2_3,1
libICE: 1.0.9_1,1
freetype2: 2.9.1
png: 1.6.34
jpeg-turbo: 1.5.3
oniguruma: 6.8.1
libmcrypt: 2.5.8_3
libltdl: 2.4.6
libzip: 1.3.2
Number of packages to be installed: 39
The process will require 33 MiB more space.
8 MiB to be downloaded.
Proceed with this action? [y/N]: y
……..
unspeakable amount of output
……..
root@wptest:~ #
Since these modules have been installed Apache needs some configuration changes. We move to the Apache’s directory.
albert@wptest:~ % cd /usr/local/etc/apache24
albert@wptest:/usr/local/etc/apache24 %
We check first what value has the AllowOverride directive directive. As the config file (httpd.conf) already explains this directive sets what other directives may be written in the .htaccess file (a very important one in Apache).
albert@wptest:/usr/local/etc/apache24 % cat httpd.conf | grep AllowOverride
AllowOverride none
# AllowOverride controls what directives may be placed in .htaccess files.
# AllowOverride FileInfo AuthConfig Limit
AllowOverride None
AllowOverride None
albert@wptest:/usr/local/etc/apache24 %
As we see the value is “None”. For WordPress to work and the plugins we will install in the future to work we need to change this value to “All”. Let’s do this.
Because the httpd.conf file is quite long (I guess this is why the GNU/Linux folks decided to scatter it on multiple directories and files in their distros making it worse) we will look for the lines where the directive appears.
albert@wptest:/usr/local/etc/apache24 % cat httpd.conf | nl | grep AllowOverride
223 AllowOverride none
253 # AllowOverride controls what directives may be placed in .htaccess files.
255 # AllowOverride FileInfo AuthConfig Limit
257 AllowOverride None
355 AllowOverride None
albert@wptest:/usr/local/etc/apache24 %
I bet the right one is on line 223. Let’s find it out.
albert@wptest:/usr/local/etc/apache24 % sudo vi +223 httpd.conf
# it explicitly to prevent problems during startup.
#
# If your host doesn't have a registered DNS name, enter its IP address here.
#
#ServerName www.example.com:80
Nope. This is not the line. Why? Just look at the surroundings of this part. It doesn’t talk about the .htaccess file nor it talks about the contents of the directory where you’re site will sit. So let’s look at the next line, the 257.
albert@wptest:/usr/local/etc/apache24 % sudo vi +257 httpd.conf
DocumentRoot "/usr/local/www/apache24/data"
<Directory "/usr/local/www/apache24/data">
#
# Possible values for the Options directive are "None", "All",
# or any combination of:
# Indexes Includes FollowSymLinks SymLinksifOwnerMatch ExecCGI MultiViews
#
# Note that "MultiViews" must be named *explicitly* --- "Options All"
# doesn't give it to you.
#
# The Options directive is both complicated and important. Please see
# http://httpd.apache.org/docs/2.4/mod/core.html#options
# for more information.
#
Options Indexes FollowSymLinks
#
# AllowOverride controls what directives may be placed in .htaccess files.
# It can be "All", "None", or any combination of the keywords:
# AllowOverride FileInfo AuthConfig Limit
#
AllowOverride None
#
# Controls who can get stuff from this server.
#
Require all granted
</Directory>
This is the right block. However line 257 is not the exact point. Just move your cursor with your favourite editor and edit “AllowOverride None” to “AllowOverride All”.
Before:
# AllowOverride controls what directives may be placed in .htaccess files.
# It can be "All", "None", or any combination of the keywords:
# AllowOverride FileInfo AuthConfig Limit
#
AllowOverride None
After:
# AllowOverride controls what directives may be placed in .htaccess files.
# It can be "All", "None", or any combination of the keywords:
# AllowOverride FileInfo AuthConfig Limit
#
AllowOverride All
This done we have to enable an Apache’s module. The rewrite one. This will allow us to modify the url’s, so your posts will show up with the attributes you wish be them numbers or SEO friendly url’s. If you’ve looked at the httpd.conf file you will find out it’s long but structured. At the beginning you find some directives and thereafter all the modules. The ones with this “#” before them are disabled ones. The ones which have it removed are enabled.
We look for the rewrite module:
albert@wptest:/usr/local/etc/apache24 % cat httpd.conf | nl | grep rewrite
175 LoadModule rewrite_module libexec/apache24/mod_rewrite.so
albert@wptest:/usr/local/etc/apache24 %
As we can read it is already an enabled module. On our original FAMP stack installation we already enabled it. If we didn’t for whatever the reason it’s enabling is as easy as to remove the “#” before it.
We now make sure Apache’s configuration is sound and shows no errors so we can restart it for the changes to take effect.
albert@wptest:/usr/local/etc/apache24 % sudo apachectl configtest
Performing sanity check on apache24 configuration:
AH00557: httpd: apr_sockaddr_info_get() failed for wptest
AH00558: httpd: Could not reliably determine the server's fully qualified domain name, using 127.0.0.1. Set the 'ServerName' directive globally to suppress this message
Syntax OK
albert@wptest:/usr/local/etc/apache24 %
An error shows up but nothing relevant since the Syntax OK phrase appears. You can leave things as they are now or you can correct this simple error.
If you choose to fix it you just have to look for the “ServerName” directive and change it to an adequate value such as localhost.
albert@wptest:/usr/local/etc/apache24 % cat httpd.conf | nl | grep ServerName
210 # ServerName gives the name and port that the server uses to identify itself.
216 #ServerName www.example.com:80
albert@wptest:/usr/local/etc/apache24 %
We go and edit line 216. If it’s not 216 it will be nearby.
ServerAdmin [email protected]
#
# ServerName gives the name and port that the server uses to identify itself.
# This can often be determined automatically, but we recommend you specify
# it explicitly to prevent problems during startup.
#
# If your host doesn't have a registered DNS name, enter its IP address here.
#
ServerName localhost:80
The line 216 is where the ServerAdmin directive falls but a few lines after you can find the ServerName directive. Change it to match what you can read just above in this guide.
We check Apache’s configuration file now and we should see there are no errors and the syntax is ok.
albert@wptest:/usr/local/etc/apache24 % sudo apachectl configtest
Performing sanity check on apache24 configuration:
Syntax OK
albert@wptest:/usr/local/etc/apache24 %
No error shown so we can now restart Apache for the changes to take effect.
albert@wptest:/usr/local/etc/apache24 % sudo apachectl restart
Performing sanity check on apache24 configuration:
Syntax OK
Stopping apache24.
Waiting for PIDS: 1299.
Performing sanity check on apache24 configuration:
Syntax OK
Starting apache24.
albert@wptest:/usr/local/etc/apache24 %
What is missing? Yep, WordPress. You can either install it using the pkg tool in FreeBSD (the equivalent to apt in Debian, zypper in SuSE and dnf (did not finish – end of my pun) in Fedora and the likes of RHEL) , you can also compile it using the ports collection, or you can fetch it from the original site and put it in place. I will show you the third way. Why? We’ll, the FreeBSD packages are regularly updated to the latest but they may be a few days behind the publisher’s schedule. The reason being they have to be compiled and the binaries have to work so this takes some time. I am quite happy with FreeBSD’s packages since they are almost up to date with upstream, something many other GNU/Linux distro’s can’t say at all. This is one of the benefits of having third party applications separated from the OS itself. You can track them to the latest. Compile it ourselves would mean us fetching it from the original source (and the very latest published source files too) and waiting for it to be compiled which is annoying since it takes lots of time. The FreeBSD binaries are already compiled with useful options. So let’s install WordPress on FreeBSD for once.
From our user’s directory we will fetch (the equivalent of wget in GNU/Linux land) WordPress.
albert@wptest:~ % fetch https://wordpress.org/latest.tar.gz
latest.tar.gz 100% of 8364 kB 1086 kBps 00m08s
albert@wptest:~ %
We now ‘untar’ it since it’s been downloaded uncompressed.
albert@wptest:~ % tar -zxvf latest.tar.gz
……
unspeakable amount of output here
……
albert@wptest:~ %
We will now find a just created wordpress directory in our home folder. Go into it.
albert@wptest:~ % cd wordpress
albert@wptest:~/wordpress %
We will now modify one of the main configuration files in WordPress so the program can talk to the database and do its thing. But before that we will create this file from the sample one.
albert@wptest:~/wordpress % cp wp-config-sample.php wp-config.php
albert@wptest:~/wordpress %
Let’s now edit the file wp-config.php
albert@wptest:~/wordpress % vi wp-config.php
………..
some output
…………
// ** MySQL settings - You can get this info from your web host ** //^M
/** The name of the database for WordPress */^M
define('DB_NAME', 'database_name_here');^M
^M
/** MySQL database username */^M
define('DB_USER', 'username_here');^M
^M
/** MySQL database password */^M
define('DB_PASSWORD', 'password_here');^M
^M
/** MySQL hostname */^M
define('DB_HOST', 'localhost');^M
………….
We haven’t edited a thing yet. We have to modify ‘database_name_here’, ‘username_here’ and ‘password_here’ and put the values we set to the database we created at the beginning of this guide. So it will look like follows after editing:
// ** MySQL settings - You can get this info from your web host ** //^M
/** The name of the database for WordPress */^M
define('DB_NAME', 'wptest');^M
^M
/** MySQL database username */^M
define('DB_USER', 'wpuser');^M
^M
/** MySQL database password */^M
define('DB_PASSWORD', 'wppasswd');^M
^M
/** MySQL hostname */^M
define('DB_HOST', 'localhost');^M
:wq
Once this is done we will move the wordpress directory’s content to it’s location. For FreeBSD sites are located into the /usr/local/www/apache24/data folder.
albert@wptest:~ % sudo cp -r ~/wordpress/* /usr/local/www/apache24/data
albert@wptest:~ %
If we list the content of the final location it should look like as follows:
albert@wptest:~ % ll /usr/local/www/apache24/data
total 139
-rw-r--r-- 1 root wheel 45 May 13 14:03 index.html
-rw-r--r-- 1 root wheel 418 May 13 15:26 index.php
-rw-r--r-- 1 root wheel 20 Jan 6 17:55 info.php
-rw-r--r-- 1 root wheel 19935 May 13 15:26 license.txt
-rw-r--r-- 1 root wheel 7415 May 13 15:26 readme.html
-rw-r--r-- 1 root wheel 5438 May 13 15:26 wp-activate.php
drwxr-xr-x 9 root wheel 90 May 13 15:26 wp-admin/
-rw-r--r-- 1 root wheel 364 May 13 15:26 wp-blog-header.php
-rw-r--r-- 1 root wheel 1627 May 13 15:26 wp-comments-post.php
-rw-r--r-- 1 root wheel 2853 May 13 15:26 wp-config-sample.php
-rw-r--r-- 1 root wheel 2829 May 13 15:26 wp-config.php
drwxr-xr-x 4 root wheel 5 May 13 15:26 wp-content/
-rw-r--r-- 1 root wheel 3669 May 13 15:26 wp-cron.php
drwxr-xr-x 18 root wheel 188 May 13 15:26 wp-includes/
-rw-r--r-- 1 root wheel 2422 May 13 15:26 wp-links-opml.php
-rw-r--r-- 1 root wheel 3306 May 13 15:26 wp-load.php
-rw-r--r-- 1 root wheel 36593 May 13 15:26 wp-login.php
-rw-r--r-- 1 root wheel 8048 May 13 15:26 wp-mail.php
-rw-r--r-- 1 root wheel 16246 May 13 15:26 wp-settings.php
-rw-r--r-- 1 root wheel 30071 May 13 15:26 wp-signup.php
-rw-r--r-- 1 root wheel 4620 May 13 15:26 wp-trackback.php
-rw-r--r-- 1 root wheel 3065 May 13 15:26 xmlrpc.php
albert@wptest:~ %
As you can see the owner of the files is root and this is in the wheel group as well. We have to change the owner and the group.
albert@wptest:~ % sudo chown -R www:www /usr/local/www/apache24/data
albert@wptest:~ %
We check the results:
albert@wptest:~ % ll /usr/local/www/apache24/data
total 139
-rw-r--r-- 1 www www 45 May 13 14:03 index.html
-rw-r--r-- 1 www www 418 May 13 15:26 index.php
-rw-r--r-- 1 www www 20 Jan 6 17:55 info.php
-rw-r--r-- 1 www www 19935 May 13 15:26 license.txt
-rw-r--r-- 1 www www 7415 May 13 15:26 readme.html
-rw-r--r-- 1 www www 5438 May 13 15:26 wp-activate.php
drwxr-xr-x 9 www www 90 May 13 15:26 wp-admin/
-rw-r--r-- 1 www www 364 May 13 15:26 wp-blog-header.php
-rw-r--r-- 1 www www 1627 May 13 15:26 wp-comments-post.php
-rw-r--r-- 1 www www 2853 May 13 15:26 wp-config-sample.php
-rw-r--r-- 1 www www 2829 May 13 15:26 wp-config.php
drwxr-xr-x 4 www www 5 May 13 15:26 wp-content/
-rw-r--r-- 1 www www 3669 May 13 15:26 wp-cron.php
drwxr-xr-x 18 www www 188 May 13 15:26 wp-includes/
-rw-r--r-- 1 www www 2422 May 13 15:26 wp-links-opml.php
-rw-r--r-- 1 www www 3306 May 13 15:26 wp-load.php
-rw-r--r-- 1 www www 36593 May 13 15:26 wp-login.php
-rw-r--r-- 1 www www 8048 May 13 15:26 wp-mail.php
-rw-r--r-- 1 www www 16246 May 13 15:26 wp-settings.php
-rw-r--r-- 1 www www 30071 May 13 15:26 wp-signup.php
-rw-r--r-- 1 www www 4620 May 13 15:26 wp-trackback.php
-rw-r--r-- 1 www www 3065 May 13 15:26 xmlrpc.php
albert@wptest:~ %
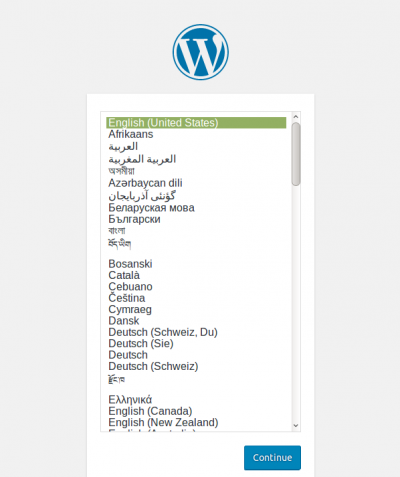
So everything is now owned by the www user, www group. Happy with all this now we point our browser to our ip or domain name and if everything is right we should find the WordPress install page.
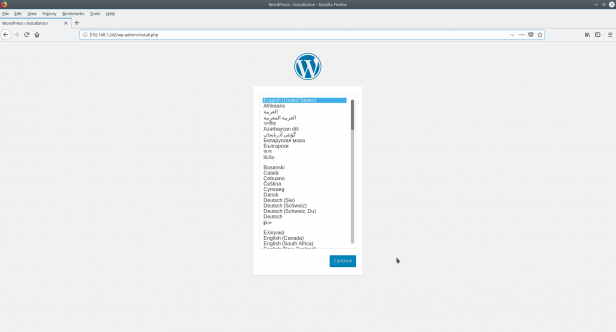
And there you go, the WordPress install screen finally appears. From now on I believe any sane human being who has touched a computer can follow on the steps without my guidance. If anyone gets lost just look for the error messages appearing (if any, none should appear) on the internet.
This is almost all on how to install WordPress on FreeBSD. Don’t forget to read these last two paragraphs.
Now be aware you will set a user name and password for your wordpress install. They will be sent in plain text so anyone in between you and the server (mainly the ISP and the host company) or someone sniffing traffic on your same network has the potential possibility to see it. Therefore other securization steps should be followed before completing the install, such as getting an SSL certificate and redirecting at least the administrator traffic for your website through https.
Do also make sure the firewall rules allow traffic to the correct ports. The port 80 is used by the http protocol. And the port 443 is used by the https one. Notice the difference is if the content it’s encrypted or not. That little ‘s’ refers to TLS (Transfer Layer Security). If you plan to have your site where users can create accounts and that sort of thing you will be better off using the port 443 only and redirecting all your traffic (not only yours) from the port 80 to the 443. To enable the use of port 443 you will have to get an SSL certificate and make use of it as mentioned before. Mind these topics are out of the scope of this article although they complete the good and safe use of your whole web site.
You will find this how to’s here at adminbyaccident.com
Update 05-2020: You can install a FAMP server + WordPress using the scripts found in the Adminbyaccident’s Github repository.
If you find the articles in Adminbyaccident.com useful to you, please consider making a donation.
Use this link to get $200 credit at DigitalOcean and support Adminbyaccident.com costs.
Get $100 credit for free at Vultr using this link and support Adminbyaccident.com costs.
Mind Vultr supports FreeBSD on their VPS offer.