Webmin is a fantastic tool for those willing to administer UNIX or unix-like systems through a GUI interface. While the CLI interface lets any user to interact with these kind of systems to the very core and extract all the juice, there are tasks where the graphical interface makes sense and its visual and quick access saves time. The list of available modules is long and using Webmin on FreeBSD, or any other system, can save precious time to many system administrators, specially in small and medium sized companies. And as always if you have good CLI knowledge this will give you more power and control if needed and just when really needed.
If you find the articles in Adminbyaccident.com useful to you, please consider making a donation.
Use this link to get $200 credit at DigitalOcean and support Adminbyaccident.com costs.
Get $100 credit for free at Vultr using this link and support Adminbyaccident.com costs.
Mind Vultr supports FreeBSD on their VPS offer.
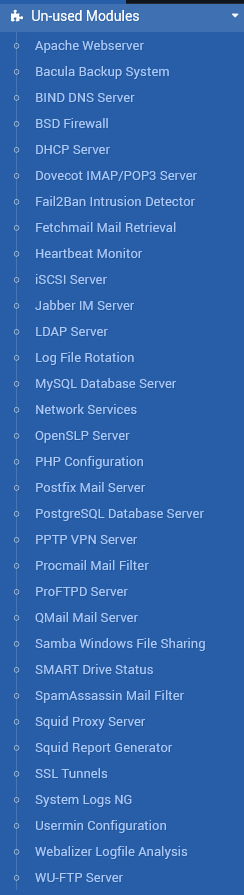
Webmin is written on Perl and different modules will enable different functionality, firewalls, mail, proxies, SSL tunnels, databases, web servers, instant messaging, file sharing are most of the categories users will find in it.
Now we have a light idea let’s get into how to install Webmin on FreeBSD 12.
For this task I’ve set myself a FreeBSD Jail but this will work on a clean install, on an already setup system, be it bare metal, virtual machine, anything. You can skip these first steps and go straight to the yellow highlighted phrase down below if you aren’t using a Jail.
[albert@BSDVM ~]$ sudo iocage create -r 12.2-RELEASE -n webmin ip4_addr="em0|192.168.1.62/24"
webmin successfully created!
[albert@BSDVM ~]$
[albert@BSDVM ~]$ sudo iocage list | grep webmin
| - | webmin | down | 12.2-RELEASE | 192.168.1.62 |
[albert@BSDVM ~]$
Once the Jails is created it is time to check for updates.
[albert@BSDVM ~]$ sudo iocage update webmin
Snapshot: zroot/iocage/jails/webmin@ioc_update_12.2-RELEASE_2021-01-05_20-28-05 created.
Updating jail...
* Updating webmin to the latest patch level...
Looking up update.FreeBSD.org mirrors... 3 mirrors found.
Fetching metadata signature for 12.2-RELEASE from update2.freebsd.org... done.
Fetching metadata index... done.
Fetching 2 metadata patches.. done.
Applying metadata patches... done.
Inspecting system... done.
Preparing to download files... done.
Fetching 64 patches.....10....20....30....40....50....60.. done.
Applying patches... done.
The following files will be updated as part of updating to
12.2-RELEASE-p2:
/bin/freebsd-version
/lib/libcrypto.so.111
/rescue/[
/rescue/bectl
/rescue/bsdlabel
/rescue/bunzip2
........
........
Installing updates...Scanning /zroot/iocage/jails/webmin/root/usr/share/certs/blacklisted for certificates...
Scanning /zroot/iocage/jails/webmin/root/usr/share/certs/trusted for certificates...
done.
release: 12.2-RELEASE -> 12.2-RELEASE-p2
Updated jail successfully.
webmin updates have been applied successfully.
[albert@BSDVM ~]$
After the updates have been applied it’s time to fire up the FreeBSD Jail named webmin.
[albert@BSDVM ~]$ sudo iocage start webmin
* Starting webmin
+ Started OK
+ Using devfs_ruleset: 1000 (iocage generated default)
+ Using IP options: ip4.addr=em0|192.168.1.62/24 ip4.saddrsel=1 ip4=new ip6.saddrsel=1 ip6=new
+ Starting services OK
+ Executing poststart OK
[albert@BSDVM ~]$
We log in to the Jail and from now on the next steps are the same for everyone, no matter if this is running on bare metal, virtual machine or a Jail.
[albert@BSDVM ~]$ sudo iocage console webmin
FreeBSD 12.2-RELEASE-p1 GENERIC
Welcome to FreeBSD!
Release Notes, Errata: https://www.FreeBSD.org/releases/
Security Advisories: https://www.FreeBSD.org/security/
FreeBSD Handbook: https://www.FreeBSD.org/handbook/
FreeBSD FAQ: https://www.FreeBSD.org/faq/
Questions List: https://lists.FreeBSD.org/mailman/listinfo/freebsd-questions/
FreeBSD Forums: https://forums.FreeBSD.org/
Documents installed with the system are in the /usr/local/share/doc/freebsd/
directory, or can be installed later with: pkg install en-freebsd-doc
For other languages, replace "en" with a language code like de or fr.
Show the version of FreeBSD installed: freebsd-version ; uname -a
Please include that output and any error messages when posting questions.
Introduction to manual pages: man man
FreeBSD directory layout: man hier
Edit /etc/motd to change this login announcement.
root@webmin:~ #
Now we are inside of the system, as if it were a bare metal install or a VM, we can proceed to install Webmin on FreeBSD.
root@webmin:~ # pkg install webmin
Updating FreeBSD repository catalogue...
FreeBSD repository is up to date.
All repositories are up to date.
Updating database digests format: 100%
The following 10 package(s) will be affected (of 0 checked):
New packages to be INSTALLED:
gettext-runtime: 0.21
indexinfo: 0.3.1
libffi: 3.3_1
p5-Authen-PAM: 0.16_2
p5-IO-Tty: 1.14
p5-Net-SSLeay: 1.88
perl5: 5.32.0
python37: 3.7.9
readline: 8.0.4
webmin: 1.954
Number of packages to be installed: 10
The process will require 300 MiB more space.
61 MiB to be downloaded.
Proceed with this action? [y/N]: y
[webmin] [1/10] Fetching webmin-1.954.txz: 100% 30 MiB 5.2MB/s 00:06
[webmin] [2/10] Fetching p5-Net-SSLeay-1.88.txz: 100% 267 KiB 273.3kB/s 00:01
[webmin] [3/10] Fetching perl5-5.32.0.txz: 100% 14 MiB 5.0MB/s 00:03
[webmin] [4/10] Fetching p5-Authen-PAM-0.16_2.txz: 100% 23 KiB 24.0kB/s 00:01
[webmin] [5/10] Fetching python37-3.7.9.txz: 100% 16 MiB 5.6MB/s 00:03
[webmin] [6/10] Fetching readline-8.0.4.txz: 100% 354 KiB 362.2kB/s 00:01
[webmin] [7/10] Fetching indexinfo-0.3.1.txz: 100% 6 KiB 5.8kB/s 00:01
[webmin] [8/10] Fetching libffi-3.3_1.txz: 100% 40 KiB 40.5kB/s 00:01
[webmin] [9/10] Fetching gettext-runtime-0.21.txz: 100% 165 KiB 168.9kB/s 00:01
[webmin] [10/10] Fetching p5-IO-Tty-1.14.txz: 100% 30 KiB 30.4kB/s 00:01
Checking integrity... done (0 conflicting)
[webmin] [1/10] Installing indexinfo-0.3.1...
[webmin] [1/10] Extracting indexinfo-0.3.1: 100%
[webmin] [2/10] Installing perl5-5.32.0...
[webmin] [2/10] Extracting perl5-5.32.0: 100%
[webmin] [3/10] Installing readline-8.0.4...
[webmin] [3/10] Extracting readline-8.0.4: 100%
[webmin] [4/10] Installing libffi-3.3_1...
[webmin] [4/10] Extracting libffi-3.3_1: 100%
[webmin] [5/10] Installing gettext-runtime-0.21...
[webmin] [5/10] Extracting gettext-runtime-0.21: 100%
[webmin] [6/10] Installing p5-Net-SSLeay-1.88...
[webmin] [6/10] Extracting p5-Net-SSLeay-1.88: 100%
[webmin] [7/10] Installing p5-Authen-PAM-0.16_2...
[webmin] [7/10] Extracting p5-Authen-PAM-0.16_2: 100%
[webmin] [8/10] Installing python37-3.7.9...
[webmin] [8/10] Extracting python37-3.7.9: 100%
[webmin] [9/10] Installing p5-IO-Tty-1.14...
[webmin] [9/10] Extracting p5-IO-Tty-1.14: 100%
[webmin] [10/10] Installing webmin-1.954...
[webmin] [10/10] Extracting webmin-1.954: 100%
=====
Message from python37-3.7.9:
--
Note that some standard Python modules are provided as separate ports
as they require additional dependencies. They are available as:
py37-gdbm databases/py-gdbm@py37
py37-sqlite3 databases/py-sqlite3@py37
py37-tkinter x11-toolkits/py-tkinter@py37
=====
Message from webmin-1.954:
--
After installing Webmin for the first time you should perform the following
steps as root:
* Configure Webmin by running /usr/local/lib/webmin/setup.sh
* Add webmin_enable="YES" to your /etc/rc.conf
* Start Webmin for the first time by running "service webmin start"
The parameters requested by setup.sh may then be changed from within Webmin
itself.
root@webmin:~ #
At the end of the installation process we will see a message where three steps are described in order to fully install Webmin and configure it just to have it start. Note them somewhere, just in case.
As instructed we now launch the install script. We have to answer a few questions when executing it. The perl path in the system is one of them, and typically the default is okay. Then the port to access Webmin through its web interface is questioned to us, indicating the default is 10000. Once this has been answered username and password to login. And finally is the connection will be through HTTP in plain text or encrypted using HTTPS.
root@webmin:~ # /usr/local/lib/webmin/setup.sh
***********************************************************************
* Welcome to the Webmin setup script, version 1.954 *
***********************************************************************
Webmin is a web-based interface that allows Unix-like operating
systems and common Unix services to be easily administered.
Installing Webmin in /usr/local/lib/webmin ...
***********************************************************************
Webmin uses separate directories for configuration files and log files.
Unless you want to run multiple versions of Webmin at the same time
you can just accept the defaults.
Log file directory [/var/log/webmin]:
***********************************************************************
Webmin is written entirely in Perl. Please enter the full path to the
Perl 5 interpreter on your system.
Full path to perl (default /usr/local/bin/perl):
Testing Perl ...
Perl seems to be installed ok
***********************************************************************
Operating system name: FreeBSD
Operating system version: 12.2
***********************************************************************
Webmin uses its own password protected web server to provide access
to the administration programs. The setup script needs to know :
- What port to run the web server on. There must not be another
web server already using this port.
- The login name required to access the web server.
- The password required to access the web server.
- If the webserver should use SSL (if your system supports it).
- Whether to start webmin at boot time.
Web server port (default 10000):
Login name (default admin): albert
Login password:
Password again:
Use SSL (y/n): y
***********************************************************************
Creating web server config files..
..done
Creating access control file..
..done
Creating start and stop scripts..
..done
Copying config files..
..done
Changing ownership and permissions ..
..done
Running postinstall scripts ..
..done
Enabling background status collection ..
..done
root@webmin:~ #
I beg you chose to use HTTPS and have encrypted connections. Yes, I know many of you are just using Webmin in inner networks where many servers do not even reach the internet whatsoever. If you choose to use HTTP you know the traffic to and from this Webmin box will travel in plain text and therefore visible to anyone in that network. Even if you have crafted clever VLANs and firewall rules (you haven’t and you know it) a malicious actor could be crafting his or hers nefarious activity. Plus, have you ever thought of an employee or colleague turning bad? Bad activity inside companies is more common than previously contemplated. Act accordingly and choose HTTPS.
Now that Webmin is installed let’s enable the service to be able to start up at boot time.
root@webmin:~ # sysrc webmin_enable="YES"
webmin_enable: -> YES
root@webmin:~ #
Time to fire it up.
root@webmin:~ # service webmin start
Starting webmin.
root@webmin:~ #
Let’s check it’s really up and running.
root@webmin:~ # ps aux | grep webmin
root 11445 1,0 0,8 44072 33352 - SsJ 20:50 0:00,01 /usr/local/bin/perl /usr/local/lib/webmin/miniserv.pl /usr/local/etc/webmin/miniserv.conf
root 11471 0,0 0,0 532 344 0 R+J 20:50 0:00,00 grep webmin
root@webmin:~ #
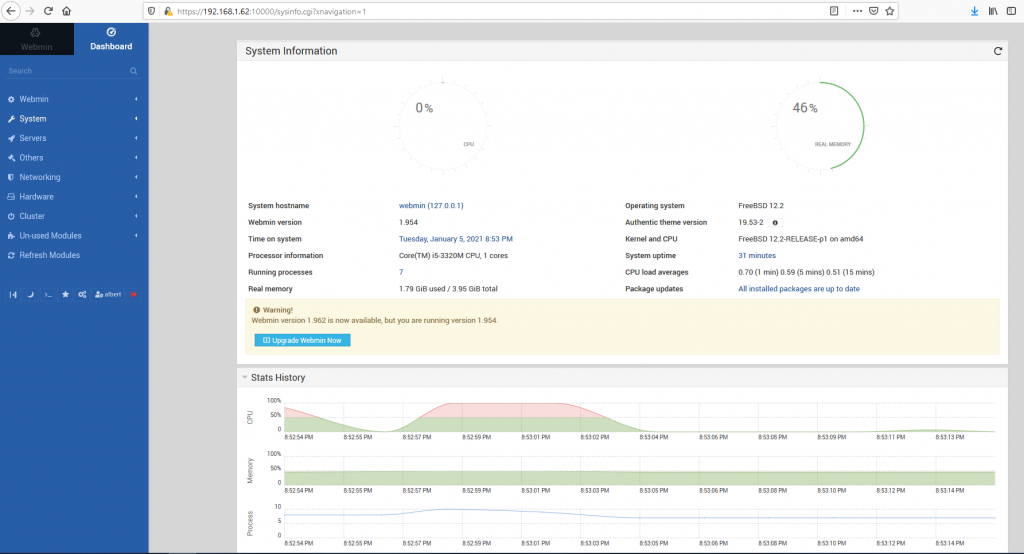
Yes it is. Hurray! Go grab your favourite web browser and point it to your FQDN or ip and your chosen port. Remember the default is 10000.
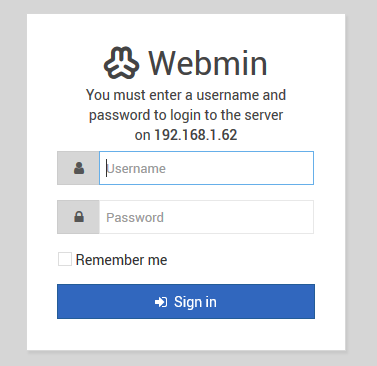
You should be prompted to a login box after you have accepted the ‘danger’ message when using that SSL/TLS certificate Webmin has put in place for you.
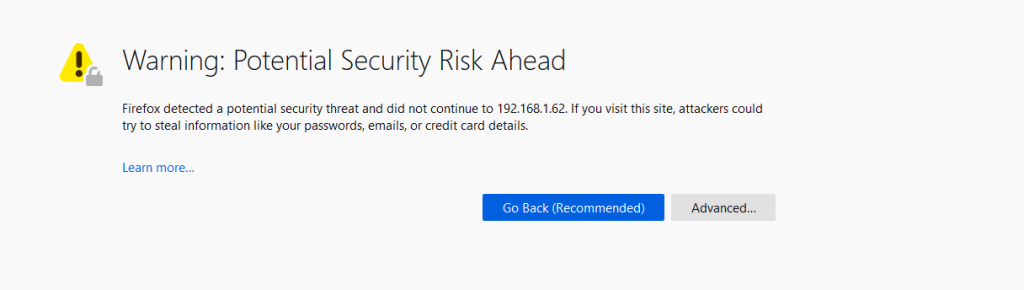
After accepting this risk warning we should be granted a login prompt.
Now, you must know a few things, like… what and where is the main configuration file for Webmin on FreeBSD? Here, my friend and this is how it looks like.
root@webmin:~ # cat /usr/local/etc/webmin/miniserv.conf
port=10000
root=/usr/local/lib/webmin
mimetypes=/usr/local/lib/webmin/mime.types
addtype_cgi=internal/cgi
realm=Webmin Server
logfile=/var/log/webmin/miniserv.log
errorlog=/var/log/webmin/miniserv.error
pidfile=/var/log/webmin/miniserv.pid
logtime=168
ssl=1
no_ssl2=1
no_ssl3=1
no_tls1=1
no_tls1_1=1
ssl_honorcipherorder=1
no_sslcompression=1
env_WEBMIN_CONFIG=/usr/local/etc/webmin
env_WEBMIN_VAR=/var/log/webmin
atboot=0
logout=/usr/local/etc/webmin/logout-flag
listen=10000
denyfile=\.pl$
log=1
blockhost_failures=5
blockhost_time=60
syslog=1
ipv6=1
session=1
premodules=WebminCore
server=MiniServ/1.954
userfile=/usr/local/etc/webmin/miniserv.users
keyfile=/usr/local/etc/webmin/miniserv.pem
passwd_file=/etc/master.passwd
passwd_uindex=0
passwd_pindex=1
passwd_mode=0
preroot=authentic-theme
passdelay=1
logout_script=/usr/local/etc/webmin/logout.pl
cipher_list_def=1
failed_script=/usr/local/etc/webmin/failed.pl
login_script=/usr/local/etc/webmin/login.pl
error_handler_403=403.cgi
error_handler_401=401.cgi
error_handler_404=404.cgi
nolog=\/stats\.cgi\?xhr\-stats\=general
root@webmin:~ #
At this point you must be aware the SSL certificate found in Webmin is still one issued by Diginotar and they had some security problems in the past that has led many browsers not to accept those and through warning messages at your screen. You can move forward with this at your will, or better yet, you can issue one certificate for your private use very quickly. This is optional but it won’t hurt you.
The steps we will follow in this optional configuration are:
-
-
- We will create a directory to place our own certs and keys.
- We will issue one key and one certificate.
- We will then create a .pem file to substitute the one Webmin has created for us.
- We will substitute the file in Webmin’s configuration, without removing the original one.
-
Let’s create a path to save our issued certificates. Feel free to choose whatever path you see fit. I create a directory for the certificates but do your thing if you prefer.
root@webmin:~ # mkdir /usr/local/certs
root@webmin:~ #
Now we create the certificate and key with the already in the system openssl program. Fill the questions as your requirements place you to do so.
root@webmin:~ # openssl req -x509 -nodes -days 365 -newkey rsa:2048 -keyout /usr/local/certs/server.key -out /usr/local/certs/server.crt
Generating a RSA private key
..+++++
..........+++++
writing new private key to '/usr/local/certs/server.key'
-----
You are about to be asked to enter information that will be incorporated
into your certificate request.
What you are about to enter is what is called a Distinguished Name or a DN.
There are quite a few fields but you can leave some blank
For some fields there will be a default value,
If you enter '.', the field will be left blank.
-----
Country Name (2 letter code) [AU]:ES
State or Province Name (full name) [Some-State]:Barcelona
Locality Name (eg, city) []:Terrassa
Organization Name (eg, company) [Internet Widgits Pty Ltd]:Adminbyaccident
Organizational Unit Name (eg, section) []:Operations
Common Name (e.g. server FQDN or YOUR name) []:Albert Valbuena
Email Address []:[email protected]
root@webmin:~ #
Let’s check if the key and the certificate have been created.
root@webmin:~ # ll /usr/local/certs
total 9
-rw-r--r-- 1 root wheel 1513 5 gen. 20:43 server.crt
-rw------- 1 root wheel 1704 5 gen. 20:42 server.key
root@webmin:~ #
Indeed, they have.
Now let’s change directory and place ourselves in /usr/local/certs. Once we are in we are going to create a new file inside merging the key and certificate so we can use them with Webmin.
root@webmin:/usr/local/certs # cat server.crt server.key > new_miniserv.pem
root@webmin:/usr/local/certs #
Now this new file exists, we will copy it to the same path where Webmin is reading its own SSL certificate. What is that path you may ask. I’m glad you did.
root@webmin:/usr/local/certs # cp /usr/local/certs/new_miniserv.pem /usr/local/etc/webmin/new_miniserv.pem
root@webmin:/usr/local/certs #
Now it’s time to change the Webmin server configuration and change the filename it’s reading the SSL cert. First we need to find the directive.
root@webmin:~ # grep -n 'miniserv.pem' /usr/local/etc/webmin/miniserv.conf
32:keyfile=/usr/local/etc/webmin/miniserv.pem
root@webmin:~ #
We now know it’s sitting on the line 32. We change the filename from miniserv.conf to our recently created new_miniserv.conf.
root@webmin:~ # vi +32 /usr/local/etc/webmin/miniserv.conf
We check we’ve changed it correctly.
root@webmin:~ # grep -n 'miniserv.pem' /usr/local/etc/webmin/miniserv.conf
32:keyfile=/usr/local/etc/webmin/new_miniserv.pem
root@webmin:~ #
And it now reads new_miniserv.conf instead of just miniserv.conf.
It’s time we restart our Webmin service so the changes are applied.
root@webmin:~ # service webmin restart
Stopping webmin.
Starting webmin.
root@webmin:~ #
Now we should grab our browser and revisit the Webmin interface. And yes, we will bre greeted with another warning since we are using a self-signed certificate. But it’s ours and under our control so we should accept it and move forward. Mind if you have a domain name of yours you can always use services like LetsEncrypt to obation free, safe and browser accepted certificates.
Webmin on FreeBSD is now a reality for this system, it’s time to explore the tool, install modules, and dig deep. In the end it will safe time and help anyone on daily tasks. Here there’s the official documentation.
On a last note I must add this service can be used to administer any kind of systems remotely. However some security measures should be contemplated.
-
- First and foremost use HTTPS, otherwise you will quickly get yourself and the systems you manage in trouble, big trouble.
- If possible do limit the number of IPs which can reach this service. This can be inconvenient since you may find yourself with a laptop in the most remote location possible with a random ip some unmaintained device in a hotel has given you.
- Changing the port number will not be any safety measure at all. Scanners can find open ports and recognize services running on them.
- Use Fail2Ban to hard block unwanted login attempts.
- Setting a VPN connection to reach this service is an option. Plan accordingly.
- Do not share usernames and passwords and do please use good ones and store them on a password manager.
- Of course limit the number of users able to access Webmin and limit their access to resources so those users can just do the tasks they need to do, nothing more, nothing less.
And this is all on this how to install Webmin on FreeBSD 12 guide. I hope this tool helps anyone willing to use it. It can be really powerful in a small or medium corporate environment. Enjoy!
If you find the articles in Adminbyaccident.com useful to you, please consider making a donation.
Use this link to get $200 credit at DigitalOcean and support Adminbyaccident.com costs.
Get $100 credit for free at Vultr using this link and support Adminbyaccident.com costs.
Mind Vultr supports FreeBSD on their VPS offer.