Suricata is a free, open source, Intrusion Detection System software, or IDS for short. But it can also act as an Intrusion Prevention System, or IPS. It works by finding patterns using heuristics typically from network traffic. When configured to just warn about suspicious activity it is called an IDS, however when it blocks the traffic because of the pernicious activity it is called an IPS. Suricata is typically installed as a plugin in pfSense, a complete enterprise grade, open source, firewall and networking distribution based on FreeBSD. If you happen to run FreeBSD as a desktop here there’s a guide on how to test pfSense on VirtualBox. However you can use Suricata as a standalone software working on network traffic inspection.
If you find the articles in Adminbyaccident.com useful to you, please consider making a donation.
Use this link to get $200 credit at DigitalOcean and support Adminbyaccident.com costs.
Get $100 credit for free at Vultr using this link and support Adminbyaccident.com costs.
Mind Vultr supports FreeBSD on their VPS offer.
As for requirements for setting up a Suricata install there is little to have, you can use it on the same server you may be running a web server, but it is a much more interesting tool to use alongside a firewall protecting an office (LAN) or a even a multi-site company (WAN). Because if you choose to use it for the latter, where it really shines, a dual NIC server or device is almost mandatory. Of course if you plan to protect a mid size to large company, the more NICs the better, although you may be also looking at Netgate hardware which comes with pfSense already installed. Whatever you may be using the mandatory bit here is having traffic mirrored to the device you pretend to use Suricata in, if you run it in parallel to other devices. That usually means running a cable from the switch or firewall into the Suricata device and configuring the port mirroring to it. If you want to use it on the same web server you may have you can do it but quite probably using a HIDS (Host-based Intrusion Detection System) will fit the purpose better.
But why all this? You may not need this IDS system but if you run a small office, having a pfSense firewall device with the Suricata package install (remember pfSense is completely based on FreeBSD) will surely be an additional layer of security. Again, not really useful for a web server, unless this is a very popular web server and a company with 15 people is dependent on it. Then this software will help protecting the network, which is its original intent. The question is how are Suricata’s alerts shown, presented to you. This type of software is typically used in mid to large organizations (again, in small environments consider pfSense, or someone doing the work for you). Usually alerts are written to syslog and forwarded to SIEM, an especialized software for incident anaylisis. An open source SIEM is OSSIM. But Suricata can be complemented by an ELK stack on top, bringing graphical capabilities to it, so you can easily work on alerts without the need of a SIEM install. This will come as an article here at a later time this year.
The following set up will be based on a DigitalOcean droplet to show it off, but you can use any VPS of your choice, or just physical hardware. Be aware of the size of the device or droplet you plan to use in production since Suricata can consume quite large resources, specially on busy networks.
First we will look for the package. If you happen to be running the latest packages within the FreeBSD package tool you will probably find Suricata 5 only. However if you are using quarterly you will find Suricata versions 4.1.6 and 5 alongside. Choose your poison, but I typically go for the latest.
[albert@VPN ~]$ pkg search suricata
suricata-5.0.1 High Performance Network IDS, IPS and Security Monitoring engine
suricata5-5.0.0.r1_2 High Performance Network IDS, IPS and Security Monitoring engine(v5)
[albert@VPN ~]$
Once we have located the package we will just install it. If in doubt, visit Freshports.org, where all the information you may need from a software running on FreeBSD is found.
[albert@VPN ~]$ sudo pkg install suricata
Contrasenya:
Updating FreeBSD repository catalogue...
FreeBSD repository is up to date.
All repositories are up to date.
The following 8 package(s) will be affected (of 0 checked):
New packages to be INSTALLED:
suricata: 5.0.1
libyaml: 0.2.2
libnet: 1.1.6_5,1
python37: 3.7.6
py37-yaml: 5.2
py37-setuptools: 41.4.0_1
pcre: 8.43_2
jansson: 2.12
Number of packages to be installed: 8
The process will require 128 MiB more space.
20 MiB to be downloaded.
Proceed with this action? [y/N]: y
.........
.........
You may want to try BPF in zerocopy mode to test performance improvements:
sysctl -w net.bpf.zerocopy_enable=1
Don't forget to add net.bpf.zerocopy_enable=1 to /etc/sysctl.conf
[albert@VPN ~]$
As always it is wise to copy somewhere else the install messages, because they tend to be very useful.
=====
Message from suricata-5.0.1:
--
If you want to run Suricata in IDS mode, add to /etc/rc.conf:
suricata_enable="YES"
suricata_interface="<if>"
NOTE: Declaring suricata_interface is MANDATORY for Suricata in IDS Mode.
However, if you want to run Suricata in Inline IPS Mode in divert(4) mode,
add to /etc/rc.conf:
suricata_enable="YES"
suricata_divertport="8000"
NOTE:
Suricata won't start in IDS mode without an interface configured.
Therefore if you omit suricata_interface from rc.conf, FreeBSD's
rc.d/suricata will automatically try to start Suricata in IPS Mode
(on divert port 8000, by default).
Alternatively, if you want to run Suricata in Inline IPS Mode in high-speed
netmap(4) mode, add to /etc/rc.conf:
suricata_enable="YES"
suricata_netmap="YES"
NOTE:
Suricata requires additional interface settings in the configuration
file to run in netmap(4) mode.
RULES: Suricata IDS/IPS Engine comes without rules by default. You should
add rules by yourself and set an updating strategy. To do so, please visit:
http://www.openinfosecfoundation.org/documentation/rules.html
http://www.openinfosecfoundation.org/documentation/emerging-threats.html
You may want to try BPF in zerocopy mode to test performance improvements:
sysctl -w net.bpf.zerocopy_enable=1
Don't forget to add net.bpf.zerocopy_enable=1 to /etc/sysctl.conf
Let’s first find out our interface with the ‘ifconfig’ command. Because this is a default FreeBSD DOcean droplet this one has only one interface (aside the loop one). It is very recommended to have one interface as a management one and the second absorving the mirrored traffic from the switch or firewall. If for whatever the reason the mirrored traffic surpasses the capacity of the system, there is always a second door. For demonstration purposes we’ll only use one here but you have been warned. And you know it. 😉
[albert@VPN ~]$ ifconfig
vtnet0: flags=8843<UP,BROADCAST,RUNNING,SIMPLEX,MULTICAST> metric 0 mtu 1500
options=6c07bb<RXCSUM,TXCSUM,VLAN_MTU,VLAN_HWTAGGING,JUMBO_MTU,VLAN_HWCSUM,TSO4,TSO6,LRO,VLAN_HWTSO,LINKSTATE,RXCSUM_IPV6,TXCSUM_IPV6>
ether 2e:d3:db:28:6a:d8
inet6 fe80::2cd3:dbff:fe28:6ad8%vtnet0 prefixlen 64 scopeid 0x1
inet 142.93.75.244 netmask 0xfffff000 broadcast 142.93.79.255
inet 10.17.0.5 netmask 0xffff0000 broadcast 10.17.255.255
media: Ethernet 10Gbase-T <full-duplex>
status: active
nd6 options=21<PERFORMNUD,AUTO_LINKLOCAL>
lo0: flags=8049<UP,LOOPBACK,RUNNING,MULTICAST> metric 0 mtu 16384
options=680003<RXCSUM,TXCSUM,LINKSTATE,RXCSUM_IPV6,TXCSUM_IPV6>
inet6 ::1 prefixlen 128
inet6 fe80::1%lo0 prefixlen 64 scopeid 0x2
inet 127.0.0.1 netmask 0xff000000
groups: lo
nd6 options=21<PERFORMNUD,AUTO_LINKLOCAL>
[albert@VPN ~]$
As we can see the network interface is named here vtnet0. Let’s add now configure this interface into promiscuous mode. Why? Because we want to do network traffic inspection we want every single network packet to be fully inspected and not just frames.
[albert@VPN ~]$ sudo ifconfig vtnet0 promisc
[albert@VPN ~]$
In order to check the change has been applied launch the following command and look for the ‘promisc’ string.
[albert@VPN ~]$ ifconfig vtnet0 | grep 'PROMISC'
vtnet0: flags=28943<UP,BROADCAST,RUNNING,PROMISC,SIMPLEX,MULTICAST,PPROMISC> metric 0 mtu 1500
[albert@VPN ~]$
And there we have it, the vtnet0 interface is now offering all the packages it receives to the kernel where they will be inspected.
We can now move on into enabling Suricata as a service, and to run on the interface vtnet0. We’ll do this using the sysrc command.
[albert@VPN ~]$ sudo sysrc suricata_enable="YES"
suricata_enable: -> YES
[albert@VPN ~]$
Now it has been added as a service let’s configure it to run on the vtnet0 interface.
[albert@VPN ~]$ sudo sysrc suricata_interface="vtnet0"
suricata_interface: -> vtnet0
[albert@VPN ~]$
To make sure the changes have been applied into the /etc/rc.conf file just type the following command. Two entries should appear:
[albert@VPN ~]$ grep -n 'suricata' /etc/rc.conf
46:suricata_enable="YES"
47:suricata_interface="vtnet0"
[albert@VPN ~]$
As shown above on line 46 and 47 in the /etc/rc.conf file we can find the suricata service and interface respectively set.
Before we fire up the service, and the packets going through the interface start being inspected, there are a few bits to configure, such as the email address we want the alerts to be received, where the rules sit, and some other questions about how Suricata works.
Suricata depends on rules to inspect and behave as an IDS. Because of this, if you happen to run this to protect a LAN, make sure you have set a rule in the firewall to get the sources you need, otherwise Suricata will not be able to pull information and perform its intended work. The rules sit in the following directory and file:
/var/lib/suricata
/var/lib/suricata/suricata.rules
Rules do also need to be sorted as priorities for alert levels, and this information is sitting in the file /usr/local/etc/suricata/classification.config. The following paragraph can be found as content in that file.
# $Id$
# classification.config taken from Snort 2.8.5.3. Snort is governed by the GPLv2
#
# The following includes information for prioritizing rules
#
# Each classification includes a shortname, a description, and a default
# priority for that classification.
#
# This allows alerts to be classified and prioritized. You can specify
# what priority each classification has. Any rule can override the default
# priority for that rule.
#
# Here are a few example rules:
#
# alert TCP any any -> any 80 (msg: "EXPLOIT ntpdx overflow";
# dsize: > 128; classtype:attempted-admin; priority:10;
#
# alert TCP any any -> any 25 (msg:"SMTP expn root"; flags:A+; \
# content:"expn root"; nocase; classtype:attempted-recon;)
#
# The first rule will set its type to "attempted-admin" and override
# the default priority for that type to 10.
#
# The second rule set its type to "attempted-recon" and set its
# priority to the default for that type.
#
#
# config classification:shortname,short description,priority
#
config classification: not-suspicious,Not Suspicious Traffic,3
config classification: unknown,Unknown Traffic,3
config classification: bad-unknown,Potentially Bad Traffic, 2
config classification: attempted-recon,Attempted Information Leak,2
config classification: successful-recon-limited,Information Leak,2
config classification: successful-recon-largescale,Large Scale Information Leak,2
There is also a reference file where you can read the URL sources where the info is obtained.
[albert@VPN /usr/local/etc/suricata]$ cat reference.config
# config reference: system URL
config reference: bugtraq http://www.securityfocus.com/bid/
config reference: bid http://www.securityfocus.com/bid/
config reference: cve http://cve.mitre.org/cgi-bin/cvename.cgi?name=
#config reference: cve http://cvedetails.com/cve/
config reference: secunia http://www.secunia.com/advisories/
#whitehats is unfortunately gone
config reference: arachNIDS http://www.whitehats.com/info/IDS
config reference: McAfee http://vil.nai.com/vil/content/v_
config reference: nessus http://cgi.nessus.org/plugins/dump.php3?id=
config reference: url http://
config reference: et http://doc.emergingthreats.net/
..........
..........
[albert@VPN /usr/local/etc/suricata]$
Another file to mention is the threshold.config where you can set how susceptible the IDS is for it to warn you about some trouble. Keep in mind an IDS can be a rather noisy element in your toolset to protect your office, company or just your two little servers. Tuning it needs time and care, expect false positives, especially in a mid to large environment. Here there’s a bit of the threshold file:
[albert@VPN /usr/local/etc/suricata]$ cat threshold.config
# Thresholding:
#
# This feature is used to reduce the number of logged alerts for noisy rules.
# Thresholding commands limit the number of times a particular event is logged
# during a specified time interval.
#
# The syntax is the following:
#
# threshold gen_id <gen_id>, sig_id <sig_id>, type <limit|threshold|both>, track <by_src|by_dst>, count <n>, seconds <t>
#
# event_filter gen_id <gen_id>, sig_id <sig_id>, type <limit|threshold|both>, track <by_src|by_dst>, count <n>, seconds <t>
#
# suppress gen_id <gid>, sig_id <sid>
# suppress gen_id <gid>, sig_id <sid>, track <by_src|by_dst>, ip <ip|subnet>
#
# The options are documented at https://suricata.readthedocs.io/en/latest/configuration/global-thresholds.html
#
# Please note that thresholding can also be set inside a signature. The interaction between rule based thresholds
# and global thresholds is documented here:
# https://suricata.readthedocs.io/en/latest/configuration/global-thresholds.html#global-thresholds-vs-rule-thresholds
# Limit to 10 alerts every 10 seconds for each source host
#threshold gen_id 0, sig_id 0, type threshold, track by_src, count 10, seconds 10
# Limit to 1 alert every 10 seconds for signature with sid 2404000
#threshold gen_id 1, sig_id 2404000, type threshold, track by_dst, count 1, seconds 10
# Avoid to alert on f-secure update
# Example taken from https://blog.inliniac.net/2012/03/07/f-secure-av-updates-and-suricata-ips/
#suppress gen_id 1, sig_id 2009557, track by_src, ip 217.110.97.128/25
#suppress gen_id 1, sig_id 2012086, track by_src, ip 217.110.97.128/25
#suppress gen_id 1, sig_id 2003614, track by_src, ip 217.110.97.128/25
[albert@VPN /usr/local/etc/suricata]$
The most important file in Suricata is the main configuration one, called suricata.yaml. As a .yaml file be aware of indentation. Respect it or rules won’t load, making it worhtless. This file is found in:
/usr/local/etc/suricata/suricata.yaml
The file is signifficantly long, so get ready to use grep with the ‘-n’ flag to find the line you need to configure. The official administration guide is going to be very helpful since there is a ton of things that can be done with Suricata.
Before we start digging in let’s scratch the surface of all of this. The first thing to consider is what type of network we are trying to monitor, a WAN or a LAN. By default the suricata.yaml file (remember this is the main configuration one) will be set to interpret the reserved block of ips for local use as it can be seen on the following extract. This is ok for a LAN but you may have to make some changes, for example if you don’t run any SQL server you may disable the variable. You may not run an OracleDB server but a MySQL one, so the 3306 port has to be declared in the ‘port-groups’ section. Just take a little time to inspect the next capture from the suricata.yaml file.
##
## Step 1: inform Suricata about your network
##
vars:
# more specific is better for alert accuracy and performance
address-groups:
HOME_NET: "[192.168.0.0/16,10.0.0.0/8,172.16.0.0/12]"
#HOME_NET: "[192.168.0.0/16]"
#HOME_NET: "[10.0.0.0/8]"
#HOME_NET: "[172.16.0.0/12]"
#HOME_NET: "any"
EXTERNAL_NET: "!$HOME_NET"
#EXTERNAL_NET: "any"
HTTP_SERVERS: "$HOME_NET"
SMTP_SERVERS: "$HOME_NET"
SQL_SERVERS: "$HOME_NET"
DNS_SERVERS: "$HOME_NET"
TELNET_SERVERS: "$HOME_NET"
AIM_SERVERS: "$EXTERNAL_NET"
DC_SERVERS: "$HOME_NET"
DNP3_SERVER: "$HOME_NET"
DNP3_CLIENT: "$HOME_NET"
MODBUS_CLIENT: "$HOME_NET"
MODBUS_SERVER: "$HOME_NET"
ENIP_CLIENT: "$HOME_NET"
ENIP_SERVER: "$HOME_NET"
port-groups:
HTTP_PORTS: "80"
SHELLCODE_PORTS: "!80"
ORACLE_PORTS: 1521
SSH_PORTS: 22
DNP3_PORTS: 20000
MODBUS_PORTS: 502
FILE_DATA_PORTS: "[$HTTP_PORTS,110,143]"
FTP_PORTS: 21
VXLAN_PORTS: 4789
##
A second important topic is the output format which you can read about extensively following this link. In short, by default a line based log alert called fast and the EVE (Extensible Event Format) are enabled, as well as Also by default a series of protocols will be logged such as http, snmp, smb or dhcp among many others. A careful read of the documentation is very recommended but just reading the main config file will also tell you what is going on. For that you can always use the following command and hit enter to show you a new line. Whenever you want to quit, just type ‘q’ and off you go.
cat /usr/local/etc/suricata/suricata.yaml | less
As already explained Suricata will log alerts in several types of logs such as the fast format or EVE, but other types of events as well, like issues with some rules, problems with the daemon, etc in the suricata.log file. Remember the logs, where they sit and what they are related to.
[albert@VPN /usr/local/etc/suricata]$ sudo ls -la /var/log/suricata
total 1582
drwx------ 2 root wheel 6 28 des. 08:24 .
drwxr-xr-x 4 root wheel 52 28 des. 08:00 ..
-rw-r--r-- 1 root wheel 1207757 28 des. 20:42 eve.json
-rw-r--r-- 1 root wheel 0 28 des. 08:24 fast.log
-rw-r--r-- 1 root wheel 643645 28 des. 20:42 stats.log
-rw-r--r-- 1 root wheel 3957 28 des. 20:17 suricata.log
[albert@VPN /usr/local/etc/suricata]$
Once we have configured Suricata to our wishes we can get the rules, verify everything is right and make it run once. The following command is also used to update the rulesets we happen to have installed afterwards.
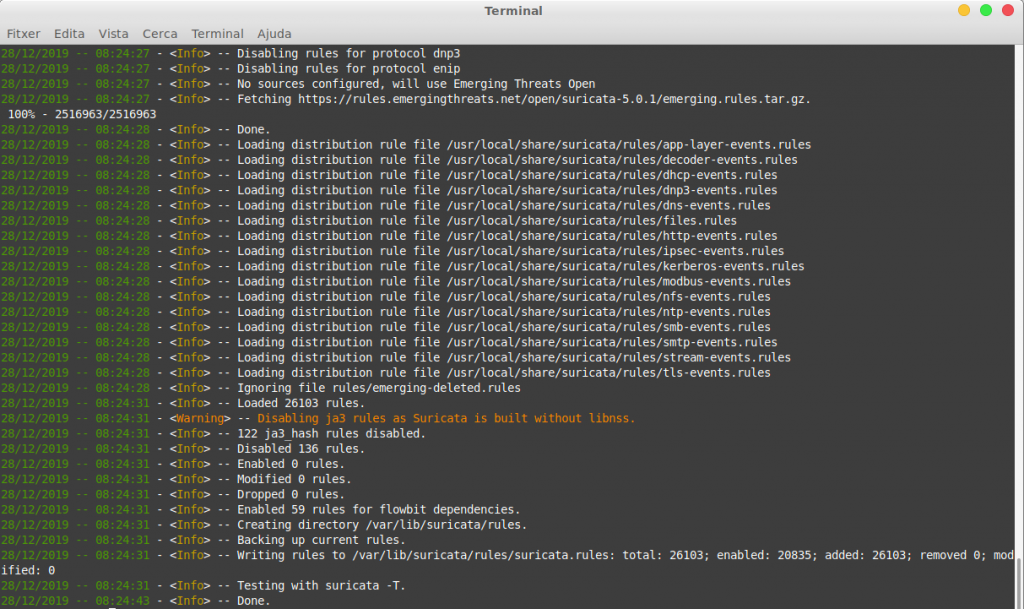
[albert@VPN ~]$ sudo suricata-update
28/12/2019 -- 08:24:27 - <Info> -- Using data-directory /var/lib/suricata.
28/12/2019 -- 08:24:27 - <Info> -- Using Suricata configuration /usr/local/etc/suricata/suricata.yaml
28/12/2019 -- 08:24:27 - <Info> -- Using /usr/local/share/suricata/rules for Suricata provided rules.
28/12/2019 -- 08:24:27 - <Info> -- Found Suricata version 5.0.1 at /usr/local/bin/suricata.
28/12/2019 -- 08:24:27 - <Info> -- Loading /usr/local/etc/suricata/suricata.yaml
28/12/2019 -- 08:24:27 - <Info> -- Disabling rules for protocol modbus
28/12/2019 -- 08:24:27 - <Info> -- Disabling rules for protocol dnp3
28/12/2019 -- 08:24:27 - <Info> -- Disabling rules for protocol enip
28/12/2019 -- 08:24:27 - <Info> -- No sources configured, will use Emerging Threats Open
28/12/2019 -- 08:24:27 - <Info> -- Fetching https://rules.emergingthreats.net/open/suricata-5.0.1/emerging.rules.tar.gz.
100% - 2516963/2516963
28/12/2019 -- 08:24:28 - <Info> -- Done.
28/12/2019 -- 08:24:28 - <Info> -- Loading distribution rule file /usr/local/share/suricata/rules/app-layer-events.rules
28/12/2019 -- 08:24:28 - <Info> -- Loading distribution rule file /usr/local/share/suricata/rules/decoder-events.rules
28/12/2019 -- 08:24:28 - <Info> -- Loading distribution rule file /usr/local/share/suricata/rules/dhcp-events.rules
28/12/2019 -- 08:24:28 - <Info> -- Loading distribution rule file /usr/local/share/suricata/rules/dnp3-events.rules
28/12/2019 -- 08:24:28 - <Info> -- Loading distribution rule file /usr/local/share/suricata/rules/dns-events.rules
28/12/2019 -- 08:24:28 - <Info> -- Loading distribution rule file /usr/local/share/suricata/rules/files.rules
28/12/2019 -- 08:24:28 - <Info> -- Loading distribution rule file /usr/local/share/suricata/rules/http-events.rules
28/12/2019 -- 08:24:28 - <Info> -- Loading distribution rule file /usr/local/share/suricata/rules/ipsec-events.rules
28/12/2019 -- 08:24:28 - <Info> -- Loading distribution rule file /usr/local/share/suricata/rules/kerberos-events.rules
28/12/2019 -- 08:24:28 - <Info> -- Loading distribution rule file /usr/local/share/suricata/rules/modbus-events.rules
28/12/2019 -- 08:24:28 - <Info> -- Loading distribution rule file /usr/local/share/suricata/rules/nfs-events.rules
28/12/2019 -- 08:24:28 - <Info> -- Loading distribution rule file /usr/local/share/suricata/rules/ntp-events.rules
28/12/2019 -- 08:24:28 - <Info> -- Loading distribution rule file /usr/local/share/suricata/rules/smb-events.rules
28/12/2019 -- 08:24:28 - <Info> -- Loading distribution rule file /usr/local/share/suricata/rules/smtp-events.rules
28/12/2019 -- 08:24:28 - <Info> -- Loading distribution rule file /usr/local/share/suricata/rules/stream-events.rules
28/12/2019 -- 08:24:28 - <Info> -- Loading distribution rule file /usr/local/share/suricata/rules/tls-events.rules
28/12/2019 -- 08:24:28 - <Info> -- Ignoring file rules/emerging-deleted.rules
28/12/2019 -- 08:24:31 - <Info> -- Loaded 26103 rules.
28/12/2019 -- 08:24:31 - <Warning> -- Disabling ja3 rules as Suricata is built without libnss.
28/12/2019 -- 08:24:31 - <Info> -- 122 ja3_hash rules disabled.
28/12/2019 -- 08:24:31 - <Info> -- Disabled 136 rules.
28/12/2019 -- 08:24:31 - <Info> -- Enabled 0 rules.
28/12/2019 -- 08:24:31 - <Info> -- Modified 0 rules.
28/12/2019 -- 08:24:31 - <Info> -- Dropped 0 rules.
28/12/2019 -- 08:24:31 - <Info> -- Enabled 59 rules for flowbit dependencies.
28/12/2019 -- 08:24:31 - <Info> -- Creating directory /var/lib/suricata/rules.
28/12/2019 -- 08:24:31 - <Info> -- Backing up current rules.
28/12/2019 -- 08:24:31 - <Info> -- Writing rules to /var/lib/suricata/rules/suricata.rules: total: 26103; enabled: 20835; added: 26103; removed 0; modified: 0
28/12/2019 -- 08:24:31 - <Info> -- Testing with suricata -T.
28/12/2019 -- 08:24:43 - <Info> -- Done.
[albert@VPN ~]$
As we have seen the ‘suricata-update’ command donwloads the rules and checks them out. You can automate this process running a dedicated cron job every day. By the way, notice where the rules sit. They are all together placed in one file, under the following path:
/var/lib/suricata/rules/suricata.rules
Suricata can run this way but managing rules this way can be a bit tricky. In another article we will make use of Oinkmaster, a rule management software for Snort (another IDS) that also works great in Suricata. Because an IDS can be quite a noisy artifact you may fall in dismay when you see the time it takes to fine tune it. Oinkmaster can help with that, since you can disable specific rulesets instead of entire sources.
Another interesting command is ‘suricata-update list-sources’ which will show the origin of the rules, such as company names, licenses and some other parameters as follows.
[albert@VPN /usr/local/etc/suricata]$ sudo suricata-update list-sources
28/12/2019 -- 19:50:41 - <Info> -- Using data-directory /var/lib/suricata.
28/12/2019 -- 19:50:41 - <Info> -- Using Suricata configuration /usr/local/etc/suricata/suricata.yaml
28/12/2019 -- 19:50:41 - <Info> -- Using /usr/local/share/suricata/rules for Suricata provided rules.
28/12/2019 -- 19:50:41 - <Info> -- Found Suricata version 5.0.1 at /usr/local/bin/suricata.
28/12/2019 -- 19:50:41 - <Info> -- No source index found, running update-sources
28/12/2019 -- 19:50:41 - <Info> -- Downloading https://www.openinfosecfoundation.org/rules/index.yaml
28/12/2019 -- 19:50:41 - <Info> -- Saved /var/lib/suricata/update/cache/index.yaml
Name: et/open
Vendor: Proofpoint
Summary: Emerging Threats Open Ruleset
License: MIT
Name: et/pro
Vendor: Proofpoint
Summary: Emerging Threats Pro Ruleset
License: Commercial
Replaces: et/open
Parameters: secret-code
Subscription: https://www.proofpoint.com/us/threat-insight/et-pro-ruleset
Name: oisf/trafficid
Vendor: OISF
Summary: Suricata Traffic ID ruleset
License: MIT
Name: ptresearch/attackdetection
Vendor: Positive Technologies
Summary: Positive Technologies Attack Detection Team ruleset
License: Custom
Name: scwx/malware
Vendor: Secureworks
Summary: Secureworks suricata-malware ruleset
License: Commercial
Parameters: secret-code
Subscription: https://www.secureworks.com/contact/ (Please reference CTU Countermeasures)
Name: scwx/security
Vendor: Secureworks
Summary: Secureworks suricata-security ruleset
License: Commercial
Parameters: secret-code
Subscription: https://www.secureworks.com/contact/ (Please reference CTU Countermeasures)
Name: sslbl/ssl-fp-blacklist
Vendor: Abuse.ch
Summary: Abuse.ch SSL Blacklist
License: Non-Commercial
Name: sslbl/ja3-fingerprints
Vendor: Abuse.ch
Summary: Abuse.ch Suricata JA3 Fingerprint Ruleset
License: Non-Commercial
Name: etnetera/aggressive
Vendor: Etnetera a.s.
Summary: Etnetera aggressive IP blacklist
License: MIT
Name: tgreen/hunting
Vendor: tgreen
Summary: Threat hunting rules
License: GPLv3
[albert@VPN /usr/local/etc/suricata]$
Now that we have cleared out a few things, we can start Suricata without any modifications to the suricata.yaml file. Obviously depending on the type of network you are using, adjustments will have to be made. Otherwise you will find yourself with way too many alerts for things that are not real issues but false positives.
If we haven’t downloaded the rules prior to starting Suricata, don’t worry, you can do it just after firing it up.
[albert@VPN /usr/local/etc/suricata]$ sudo service suricata start
Starting suricata.
[100403] 28/12/2019 -- 20:53:16 - (suricata.c:1084) <Notice> (LogVersion) -- This is Suricata version 5.0.1 RELEASE running in SYSTEM mode
[albert@VPN /usr/local/etc/suricata]$
We now check it’s up and running.
[albert@VPN /usr/local/etc/suricata]$ ps aux | grep suricata
root 24659 0,0 38,7 417296 389032 - Ss 20:53 0:17,55 /usr/local/bin/suricata -D --pcap=vtnet0 --pidfile /var/run/suricata.pid -c /usr/local/etc/suricata/suricata.yaml
albert 24683 0,0 0,0 524 336 1 R+ 20:59 0:00,00 grep suricata
[albert@VPN /usr/local/etc/suricata]$
And just for curiosity you can check the suricata.log file to inspect everything has run smoothly.
[albert@VPN /usr/local/etc/suricata]$ sudo tail /var/log/suricata/suricata.log
[100380] 28/12/2019 -- 20:53:18 - (detect-engine-build.c:1416) <Info> (SigAddressPrepareStage1) -- 20838 signatures processed. 1067 are IP-only rules, 4837 are inspecting packet payload, 14705 inspect application layer, 103 are decoder event only
[100380] 28/12/2019 -- 20:53:28 - (util-runmodes.c:173) <Info> (RunModeSetLiveCaptureAutoFp) -- Using 1 live device(s).
[100427] 28/12/2019 -- 20:53:28 - (source-pcap.c:351) <Info> (ReceivePcapThreadInit) -- using interface vtnet0
[100427] 28/12/2019 -- 20:53:28 - (source-pcap.c:362) <Info> (ReceivePcapThreadInit) -- running in 'auto' checksum mode. Detection of interface state will require 1000ULL packets
[100427] 28/12/2019 -- 20:53:28 - (util-ioctl.c:112) <Info> (GetIfaceMTU) -- Found an MTU of 1500 for 'vtnet0'
[100427] 28/12/2019 -- 20:53:28 - (source-pcap.c:399) <Info> (ReceivePcapThreadInit) -- Set snaplen to 1524 for 'vtnet0'
[100380] 28/12/2019 -- 20:53:28 - (runmode-pcap.c:295) <Info> (RunModeIdsPcapAutoFp) -- RunModeIdsPcapAutoFp initialised
[100380] 28/12/2019 -- 20:53:28 - (util-conf.c:162) <Info> (ConfUnixSocketIsEnable) -- Running in live mode, activating unix socket
[100380] 28/12/2019 -- 20:53:28 - (unix-manager.c:129) <Info> (UnixNew) -- Using unix socket file '/var/run/suricata/suricata-command.socket'
[100380] 28/12/2019 -- 20:53:28 - (tm-threads.c:2165) <Notice> (TmThreadWaitOnThreadInit) -- all 2 packet processing threads, 4 management threads initialized, engine started.
[albert@VPN /usr/local/etc/suricata]$
As you can see Suricata is up and running with no issues. In later articles we will see how to run the syslog facility to send the logs to a SIEM, how to manage rules with Oinkmaster instead of the regular commands and how to add an ELK stack in order to have a graphical view of alerts.
Summary of things to check out when installing Suricata on FreeBSD.
– Remember to assign at least one interface.
– LAN or WAN configuration.
– Output format, fast, EVE and stats are enabled by default. Activate any other necessary ones.
– Threshold configuration. The boundaries of an alert trigger.
– Classification config. Tune the priority of any category you need to touch.
– Reference config. Add sources or turn off the ones you don’t want.
– Syslog. If you need to send logs to a SIEM software, remember to enable this.
– Log rotation. You can start reading this guide.
– Source updates. Cron jobs can handle this.
Other resources:
The latest manual of Suricata in pdf.
If you find the articles in Adminbyaccident.com useful to you, please consider making a donation.
Use this link to get $200 credit at DigitalOcean and support Adminbyaccident.com costs.
Get $100 credit for free at Vultr using this link and support Adminbyaccident.com costs.
Mind Vultr supports FreeBSD on their VPS offer.