Nextcloud. Have you heard of it? That’s quite probable if you’re here. But, what is it, what is it? Some say it is a Google Apps replacement, some say it’s just a place to store your documents, some others just rely on it to share documents across the company and edit them just in time for the next meeting. Have you heard of Microsoft’s One Drive? Yeah. That. Sort of.
While Nextcloud doesn’t offer by default the chance to edit documents it can be expanded to be used just as Google Docs or Microsoft’s Office 365 offers, but without anyone looking over your shoulder or emptying your wallet like money is running out in this universe. A calendar app, a contacts app, an Android one to synchronize all those docs you will upload, a pdf viewer, a video player and a few more extend Nextcloud to become the inner, utter and ultimate Office software available to the small and medium sized enterprise, specially when you add the Collabora suite.
If you find the articles in Adminbyaccident.com useful to you, please consider making a donation.
Use this link to get $200 credit at DigitalOcean and support Adminbyaccident.com costs.
Get $100 credit for free at Vultr using this link and support Adminbyaccident.com costs.
Mind Vultr supports FreeBSD on their VPS offer.
Unluckily for FreeBSD users Nextcloud doesn’t seem to support the Collabora editing suite yet, hopefully they will in the future. However, that could be achieved through a VM inside FreeBSD’s bhyve virtualization platform, hosting a GNU/Linux instance of your choice and connecting both pieces. More of that in the future.
Nextcloud can be very useful without the online editing capabilities of Collabora, just using LibreOffice on the desktop or the Office suite of your taste. With that said, let’s tacke this how to install Nextcloud on FreeBSD 12.
Step 0. Pre-requisites
You will need to have a FreeBSD box running with at least 2 CPUs and 2GB or RAM. Yes Nextcloud can run with less RAM and all that. But if you appreciate your mental health and speed I beg you to get over those low 2GB.
As a base for this install a FAMP stack server is needed as well. Choose your tutorial from my selection.
FAMP stack at adminbyaccident.com
FAMP stack at digitalocean.com (same author)
For those willing to get it busy have a look at this configuration change for Apache and PHP to improve performance a lot. I mean, don’t use pre-fork if this is going to be a busy server.
Scripts can be found here, choose the one you like, but this one is what I’ve been using for this guide you’re reading.
Optional (but nowadays mandatory).
You may want to have some security on this, like HTTPS and have your own certificate. These are a few guides to achieve those goals.
How to harden Apace HTTP at adminbyaccident.com.
Recommended steps to harden Apache HTTP on FreeBSD 12 at digitalocean.com (same author).
For this guide on how to install Nextcloud on FreeBSD 12, I’d recommend follow/use this script to get TLS connections with a self signed certificate.
However, if you prefer to play with Letsencrypt certificates you may choose to follow the steps on this other guide I wrote a while ago.
Step 1. Adjust PHP and install some extra packages.
We’ll first install some mandatory packages to be used with Nextcloud. Some may be already installed with the FAMP stack. Nevertheless we’ll do that anyway, since the system will know which are and which aren’t.
# pkg install -y php74-zip php74-mbstring php74-gd php74-zlib php74-curl php74-openssl php74-pdo_mysql php74-pecl-imagick php74-intl php74-bcmath php74-gmp php74-fileinfo
Once those mackages have been installed we will tune PHP to load a bit more memory than its default 128M and upgrade that to at least 512M.
# sed -i -e 's/memory_limit = 128M/memory_limit = 512M/g' /usr/local/etc/php.ini
Because we have updated PHP’s configuration and installed some packages related to it we need to restart the service in order for it to digest the changes.
If you’ve tuned the FAMP stack with the Event-MPM and placed PHP-FPM on it restart the PHP service with the following command:
# service php-fpm restart
If you have left the default configuration with the Pre-Fork configuration, just restart Apache HTTP:
# service apache24 restart
With the base system installed and configured it’s time to install Nextcloud on FreeBSD 12.
Step 2.- Configure the FAMP stack for Nextcloud
For Nextcloud to properly work on this FreeBSD install (or any other one) we need to adjust some configuration in Apache HTTP.
Let’s backup the main configuration file at its current status, just in case.
# cp /usr/local/etc/apache24/httpd.conf /usr/local/etc/apache24/httpd.conf.backup
Now we will set an alias directive inside Apache’s HTTP main configuration so any URL matching nextcloud will be diverted to this install.
Get your favourite editor and place the following block into the bottom of Apache’s main configuration file named /usr/local/etc/apache24/httpd.conf.
Alias /nextcloud /usr/local/www/nextcloud
AcceptPathInfo On
<Directory /usr/local/www/nextcloud>
AllowOverride All
Require all granted
</Directory>
With this in place let’s now enable VirtualHosts in Apache HTTP.
We’ll make use of FreeBSD’s sed program:
# sed -i -e 's/#Include etc\/apache24\/extra\/httpd-vhosts.conf/Include etc\/apache24\/extra\/httpd-vhosts.conf/g' /usr/local/etc/apache24/httpd.conf
With VirtualHosts enabled let’s edit one for our Nextcloud installation.
The file we need to edit is: /usr/local/etc/apache24/extra/httpd-vhosts.conf
Make a backup copy if you want but the sample file is already there. With your favourite editor just go ahead and remove whatever content you find and place this block.
<VirtualHost *:80>
ServerName Nextcloud
ServerAlias Nextcloud
DocumentRoot "/usr/local/www/nextcloud"
ErrorLog "/var/log/nextcloud-error_log"
CustomLog "/var/log/nextcloud-access_log" common
RewriteEngine On
RewriteCond %{HTTPS} off
RewriteRule ^(.*)$ https://%{HTTP_HOST}$1 [R=301,L]
Protocols h2 h2c http/1.1
</VirtualHost>
<VirtualHost *:443>
ServerName Nextcloud
ServerAlias Nextcloud
DocumentRoot "/usr/local/www/nextcloud"
SSLEngine on
SSLProtocol all -SSLv2 -SSLv3 -TLSv1 -TLSv1.1
SSLHonorCipherOrder on
SSLCipherSuite ECDHE-ECDSA-AES128-GCM-SHA256:ECDHE-RSA-AES128-GCM-SHA256:ECDHE-ECDSA-AES256-GCM-SHA384:ECDHE-RSA-AES256-GCM-SHA384:ECDHE-ECDSA-CHACHA20-POLY1305:ECDHE-RSA-CHACHA20-POLY1305:DHE-RSA-AES128-GCM-SHA256:DHE-RSA-AES256-GCM-SHA384
SSLCertificateFile "/usr/local/etc/apache24/server.crt"
SSLCertificateKeyFile "/usr/local/etc/apache24/server.key"
ErrorLog "/var/log/nextcloud-error_log"
CustomLog "/var/log/nextcloud-access_log" common
Protocols h2 http/1.1
</VirtualHost>
This configuration has all the necessary bits for Nextcloud to work, and to work with minimal security.
For all this changes to be applied one must restart Apache HTTP. However, if you want to test the configuration is correct just apply this command first.
# apachectl configtest
If it’s correct just proceed with a restart
# service apache24 restart
Now let’s tackle the MySQL part. Nextcloud needs a database to store information and so on. We have to create a DB inside MySQL for nextcloud, as well as a username and a password for Nextcloud to operate on that DB.
Let’s interact with MySQL with the following command:
# mysql -u root -p
Enter MySQL’s root password and you will be prompted into MySQL’s CLI interface. You’ll see something similar to this:
root@nexi:~ # mysql -u root -p
Enter password:
Welcome to the MySQL monitor. Commands end with ; or \g.
Your MySQL connection id is 10
Server version: 8.0.22 Source distribution
Copyright (c) 2000, 2020, Oracle and/or its affiliates. All rights reserved.
Oracle is a registered trademark of Oracle Corporation and/or its
affiliates. Other names may be trademarks of their respective
owners.
Type 'help;' or '\h' for help. Type '\c' to clear the current input statement.
root@localhost [(none)]>
Once in let’s add the database for Nextcloud, the username and password, and set the permissions for that user over the DB.
We create the database with this command:
root@localhost [(none)]> CREATE DATABASE Nextcloud;
Query OK, 1 row affected (0.01 sec)
root@localhost [(none)]>
It’s a good idea not to use Nextcloud for the DB name. Choose something or your taste.
Now we’ll create the username and password.
root@localhost [(none)]> CREATE USER 'barrufeta'@'localhost' IDENTIFIED WITH mysql_native_password BY 'barrufetaXP-64';
Query OK, 0 rows affected (0.02 sec)
root@localhost [(none)]>
Just don’t use the same username and password that is already on the internet and change ‘barrufeta’ with the username of your choice as well as the ‘barrufetaXP-64’ password to something else.
Let’s now give permissions to the user we’ve created over the DB.
root@localhost [(none)]> GRANT ALL PRIVILEGES ON Nextcloud.* TO 'barrufeta'@'localhost';
Query OK, 0 rows affected (0.01 sec)
root@localhost [(none)]>
Once this has been done let’s flush privileges so everything gets loaded.
root@localhost [(none)]> FLUSH PRIVILEGES;
Query OK, 0 rows affected (0.00 sec)
root@localhost [(none)]>
Type exit to leave the MySQL CLI interface.
This box is now ready to receive Nextcloud on FreeBSD.
Step 3.- Install Nextcloud.
This is almost the final part of this how to install Nextcloud on FreeBSD 12. First we will download Nextcloud. Look for the latest version. At the time of writing this tutorial/guide the latest and greatest is version 20.0.7. Check them out at this link.
# fetch -o /usr/local/www/nextcloud-20.0.7.zip https://download.nextcloud.com/server/releases/nextcloud-20.0.7.zip
When using that command we’ve just placed the zip file under the web directory in FreeBSD. Let’s extract the content.
# unzip -d /usr/local/www/ /usr/local/www/nextcloud-20.0.7.zip
Once we’ve unzipped the contents, we’ll give ownership of the just extracted Nextcloud program to the ‘www’ user, the one for Apache HTTP by default on FreeBSD.
# chown -R www:www /usr/local/www/nextcloud
With all this in place we can visit our server’s ip or domain with a browser and finish the install there. Mind to visit: https://domain-name.com/ to perform the install.
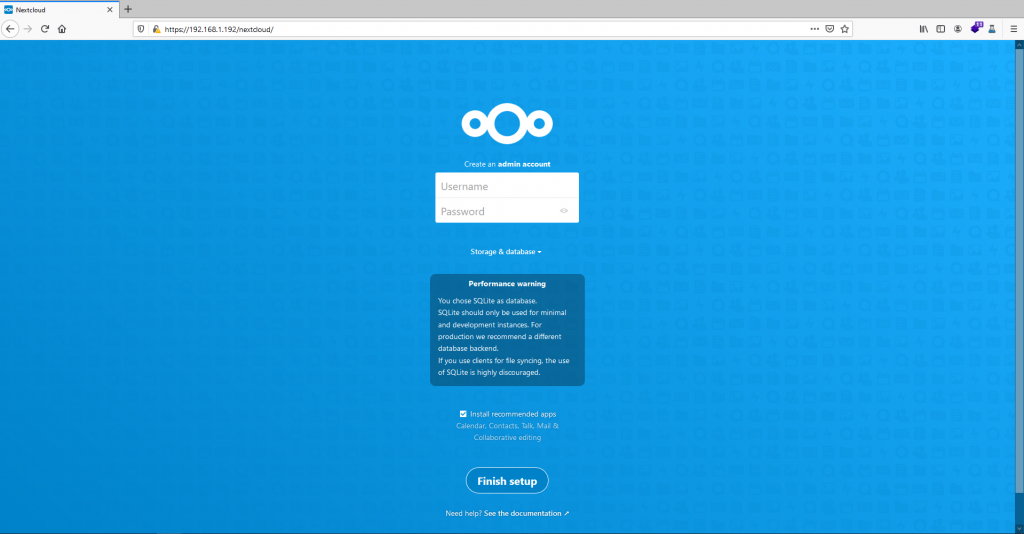
Now you have to choose an username and a password to access Nextcloud once its install is finished. Be warned you also have to choose the DB engine, so click on ‘Storage & Database’ to expand the menu and select MySQL/MariaDB instead of the default SQLite.
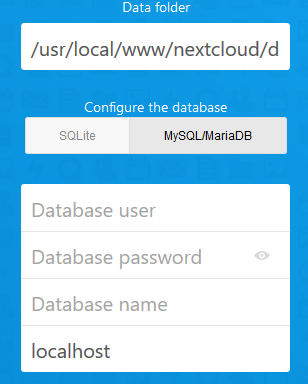
Why? MySQL or MariaDB are more powerful than SQLite if you plan to use Nextcloud with many files and potentially many users.
Remembert the DB name, the user and the password you previously set on the MySQL configuration bit? Time to use them in the GUI install.
With all the data introduced you should be seeing something like this on your browser:

Click on the ‘Finish Setup’ button at the bottom of the page whenever all those fields are filled with the correct information.
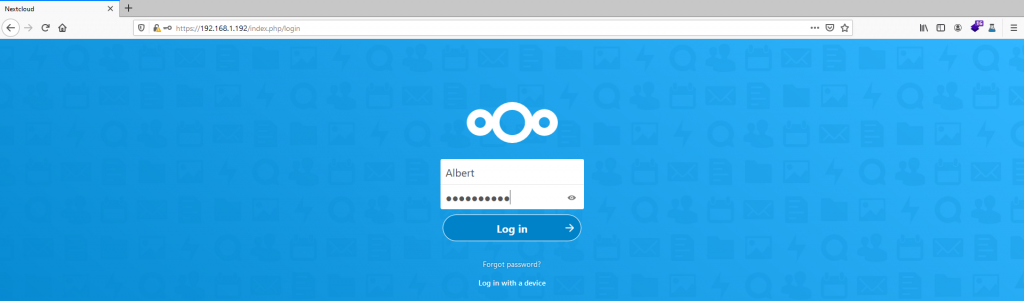
Vi A few seconds later you should be prompted to the Nextcloud login page.
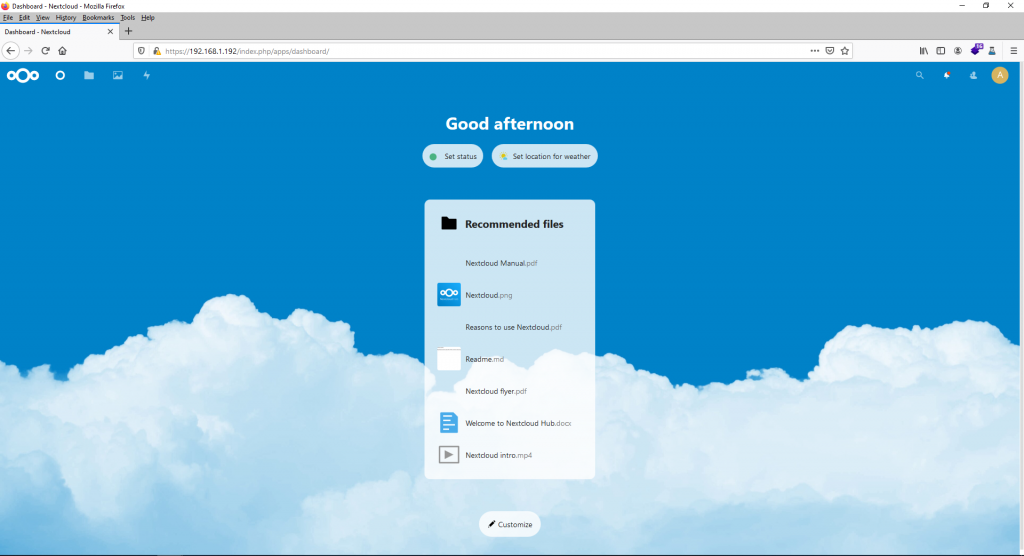
Once inside we will be welcome with a slider we can close and then this:
Once here we are done. This is how to install Nextcloud on FreeBSD.
However, if you want to have a more secure installation I do not only recommed using the scripts I’ve recommended during the article or use this big one with everything here included (adjust usernames, passwords, database names, etc) but o also have a look at the ‘How to secure Nextcloud on FreeBSD 12’ article.
If you find the articles in Adminbyaccident.com useful to you, please consider making a donation.
Use this link to get $200 credit at DigitalOcean and support Adminbyaccident.com costs.
Get $100 credit for free at Vultr using this link and support Adminbyaccident.com costs.
Mind Vultr supports FreeBSD on their VPS offer.