
Was ist das? OpenVAS is a vulnerability scanner. If you are unfamiliar to the vulnerability scanning world this can be an overwhelmingly experience but tools like this are what makes the matter more accessible, more manageable, easy to see and easy to fix. Before digging into the matter at hand here, that is how to install OpenVAS on FreeBSD, let’s put some context here.
Vulnerabilities, as you may already know, are those security problems on software, like a Windows box or a WordPress website, or hardware ones, like spectre and meltdown. And they are usually just mistakes or use of structures or facilities in a malicious way the designers didn’t intend to happen at all.
There is a list of weaknesses were anyone can have a look at different types of bugs and issues. It is called CWE which stands for Common Weakness Enumeration. But there are other lists, specifically list of vulnerabilities, like the NVD , the National Vulnerability Database, from the USA government. On this last one you may find vulnerabilities, what are their effects, how critical they are, etc.
Vulnerabilities have a common way to enumerate them, which is a CVE number, also called Common Vulnerabilities and Exposures. And they do also have a score system so the criticallity and urgency to patch can be measured. The scoring system is called Common Vulnerability Scoring System. All this information may look foreign to many people but once you get into it, it becomes familiar pretty quickly. Some may be thinking, why is all this relevant on how to install OpenVAS on FreeBSD?
If you find the articles in Adminbyaccident.com useful to you, please consider making a donation.
Use this link to get $200 credit at DigitalOcean and support Adminbyaccident.com costs.
Get $100 credit for free at Vultr using this link and support Adminbyaccident.com costs.
Mind Vultr supports FreeBSD on their VPS offer.
The answer comes straight away. If you don’t know what OpenVAS is and what is it for, you won’t even consider it. Penetration testers are nowadays laptops full of software to do their jobs and OpenVAS is one of those tools. Kali Linux is a pentesting focused distribution where OpenVAS already comes embedded so anyone can reach to a client’s network and do some vulnerability scanning to assess their infrastructure. There is an upcoming, on the works, security spin-off sort of distro on the BSD camp, based on OpenBSD called SecBSD. Let’s see what the future brings on that.
Here at the present time OpenVAS isn’t only for pentesters and other security wild animals. OpenVAS and similar tools should be part of any enterprise network. If five computers are sitting on a company it may not be necessary. But when someone is dealing with dozens of client machines running Windows, a couple of servers, some networking equipment here and there, and why not, some other facilities with more devices a few kilometres away in another branch, OpenVAS is a necessary tool often times gets overlooked.
As a system administrator control over the devices means control over the infrastructure. If you are working for someone else your job is to have that equipment, up, running and secure. Tools like this facilitate the work. Yes, you may be relying on Windows updates and haven’t have many big issues (although everyone has had them occasionally). The network may be pretty secure, you are patching regularly and so on. But hey there comes the day when the lack of time, new equipment comes in, some other unrelated issues come up and the tight control you had disappears. Some funny users deactivate Windows updates. Some do stupid things and get infected. A tool like OpenVAS can give you a grasp of what is on your infrastructure, what vulnerabilities are present, and just a few clicks away you know how bad it is, and how to act.
How does OpenVAS work? Another article will explain it with more detail but basically OpenVAS, downloads at install time the most recent of those above mentioned lists of vulnerabilities plus some others, runs Nmap scans over the network, and presents the information in a nice, easy to digest manner on the screen.
Let’s now go into the how to install OpenVAS on FreeBSD. You can do this on a regular FreeBSD box or inside a FreeBSD Jail, which can be done with Iocage.
As always do first update your system and sources. Because I did this on a recently created FreeBSD Jail you will see the pkg database wasn’t present but it downloads as soon as it sees there isn’t one.
root@openvas:~ # pkg update
The package management tool is not yet installed on your system.
Do you want to fetch and install it now? [y/N]: y
Bootstrapping pkg from pkg+http://pkg.FreeBSD.org/FreeBSD:11:amd64/latest, please wait...
Verifying signature with trusted certificate pkg.freebsd.org.2013102301... done
[openvas] Installing pkg-1.10.5_5...
[openvas] Extracting pkg-1.10.5_5: 100%
Updating FreeBSD repository catalogue...
pkg: Repository FreeBSD load error: access repo file(/var/db/pkg/repo-FreeBSD.sqlite) failed: No such file or directory
[openvas] Fetching meta.txz: 100% 944 B 0.9kB/s 00:01
[openvas] Fetching packagesite.txz: 100% 6 MiB 392.6kB/s 00:17
Processing entries: 100%
FreeBSD repository update completed. 31989 packages processed.
All repositories are up to date.
root@openvas:~ #
We then look for the OpenVAS package.
root@openvas:~ # pkg search openvas
openvas8-8.0_2 openvas 8 vulnerability scanner (metaport)
openvas8-cli-1.4.5 OpenVAS 8 command-line interface and Nagios plugin
openvas8-libraries-8.0.9 OpenVAS 8 libraries
openvas8-manager-6.0.11_2 OpenVAS 8 manager
openvas8-scanner-5.0.8_3 OpenVAS 8 scanner
openvas9-9.0_2 openvas 8 vulnerability scanner (metaport)
openvas9-cli-1.4.5 OpenVAS 9 command-line interface and Nagios plugin
openvas9-libraries-9.0.1 OpenVAS 9 libraries
openvas9-manager-7.0.2_2 OpenVAS 9 manager
openvas9-scanner-5.1.1_3 OpenVAS 9 scanner
rubygem-openvas-omp-0.0.4 Communicate with OpenVAS manager through OMP
root@openvas:~ #
There are two versions available. We go for the latest one.
root@openvas:~ # pkg install openvas9-9.0_2
Updating FreeBSD repository catalogue...
FreeBSD repository is up to date.
All repositories are up to date.
Updating database digests format: 100%
The following 97 package(s) will be affected (of 0 checked):
New packages to be INSTALLED:
#### Lots of output later ... ####
[openvas] [95/97] Installing openvas9-cli-1.4.5...
[openvas] [95/97] Extracting openvas9-cli-1.4.5: 100%
[openvas] [96/97] Installing greenbone-security-assistant9-7.0.2_2...
[openvas] [96/97] Extracting greenbone-security-assistant9-7.0.2_2: 100%
[openvas] [97/97] Installing openvas9-9.0_2...
#### Some OpenVAS instructions later ####
9) Enjoy it
##################################################################
root@openvas:~ #
Now that OpenVAS is installed you may execute the instructions you’ve been given at install time. I paste them here below so you can read them from here too.
OpenVAS 9 ports were installed
1) Redis is a dependency of OpenVAS. Please, configure redis-server for
listening on socket /tmp/redis.sock. openvassd needs it
2) If you installed security/openvas8-manager port (openvasmd) with PostgrSQL
support, please look at:
/usr/local/share/docs/openvas-scanner/postgres-HOWTO
It will guide you for configure PostgreSQL as OpenVAS database backend
instead of SQLite3
3) The following steps are neccessary before of you can access to OpenVAS web
interface (gsad):
# openvassd
# greenbone-nvt-sync
# greenbone-scapdata-sync
# greenbone-certdata-sync
# openvasmd --rebuild --progress
# openvasmd --create-user=admin --role=Admin
# openvasmd --user=admin --new-password=yourpassword
4) Add the following lines to /etc/rc.conf
openvassd_enable="YES"
openvasmd_enable="YES"
gsad_enable="YES"
5) Start OpenVAS Scanner. It will listen on /var/run/openvassd.sock by default
# service openvassd restart
6) 5) Start OpenVAS Manager. It will listen on /var/run/openvasmd.sock by default
# service openvasmd restart
# openvasmd --rebuild --progress
7) Start OpenVAS web interface. It will listen on http://127.0.0.1:8080 by
default
# service gsad start
8) gsad can export results to PDF. It needs print/texlive-texmf port
# pkg install texlive-texmf
It will install 1G of data
9) Enjoy it
So yes, Redis is a runtime dependency for OpenVAS, so you will have to tweak one bit to get OpenVAS to work. To do that you must go and find the Redis main configuration file. It’s inside:
root@openvas:/usr/local/etc # vi redis.conf
# Redis configuration file example.
#
# Note that in order to read the configuration file, Redis must be
# started with the file path as first argument:
#
# ./redis-server /path/to/redis.conf
.........
Do now as you are told on step one of the install and give redis a socket to read from. First look for the line where the word ‘unixsocket’ is placed:
root@openvas:~ # nl -ba /usr/local/etc/redis.conf | grep 'unixsocket'
109 # unixsocket /tmp/redis.sock
110 # unixsocketperm 700
root@openvas:~ #
Change the line or just add the following:
root@openvas:~ # vi +109 /usr/local/etc/redis.conf
# unixsocket /tmp/redis.sock
# unixsocketperm 700
unixsocket /tmp/redis.sock
unixsocketperm 700
root@openvas:~ #
You can now add the redis service on /etc/rc.conf and fire it up if you wish.
root@openvas:~ # sysrc redis_enable="YES"
redis_enable: -> YES
root@openvas:~ # service redis start
Starting redis.
root@openvas:~ #
Now, because we are running OpenVAS 9 we can skip step 2 of the install message. So let’s go for the rest of the steps.
On step three one must launch the following commands, each at a time.
# openvassd
This is the OpenVAS Scanner and must be invoked at this step.
root@openvas:~ # openvassd
Warning: using insecure memory!
root@openvas:~ #
Don’t panic of the insecure memory message from gnupg.
# greenbone-nvt-sync
This command will download all the lists, signatures and information relative to vulnerabilities and so on, from the company building OpenVAS, which is Greenbone. The output of this is long and it will take quite some time and how much will depend on your network.
# greenbone-scapdata-sync
Some syncing… with Greenbone servers, timestamps come, etc.
# greenbone-certdata-sync
More data files downloading
# openvasmd --rebuild –progress
This command will build all the structure and the NVT cache.
root@openvas:~ # openvasmd --rebuild --progress
Rebuilding NVT cache... done.
root@openvas:~ #
Next step…
# openvasmd --create-user=admin –role=Admin
This step is quite obvious.
# openvasmd --user=admin –new-password=yourpassword
As obvious as this one is too.
Time to tackle step four and add some services on the /etc/rc.conf file.
root@openvas:~ # sysrc openvassd_enable="YES"
openvassd_enable: -> YES
root@openvas:~ # sysrc openvasmd_enable="YES"
openvasmd_enable: -> YES
root@openvas:~ # sysrc gsad_enable="YES"
gsad_enable: -> YES
root@openvas:~ #
Let’s now fire the OpenVAS Scanner.
root@openvas:~ # service openvassd restart
Stopping openvassd.
Waiting for PIDS: 6157.
Starting openvassd.
Warning: using insecure memory!
root@openvas:~ #
Time now to start the OpenVAS Manager.
root@openvas:~ # service openvasmd restart
openvasmd not running? (check /var/run/openvasmd.pid).
Starting openvasmd.
root@openvas:~ #
Let’s rebuild the NVT cache.
root@openvas:~ # openvasmd --rebuild --progress
Rebuilding NVT cache... done.
root@openvas:~ #
To start up the OpenVAS web interface do this:
root@openvas:~ # service gsad start
Starting gsad.
Warning: using insecure memory!
Warning: MHD_USE_THREAD_PER_CONNECTION must be used only with MHD_USE_INTERNAL_POLLING_THREAD. Flag MHD_USE_INTERNAL_POLLING_THREAD was added. Consider setting MHD_USE_INTERNAL_POLLING_THREAD explicitly.
root@openvas:~ #
Ignore the warnings from gnupg and go to your browser and go to the server ip and port 8080.
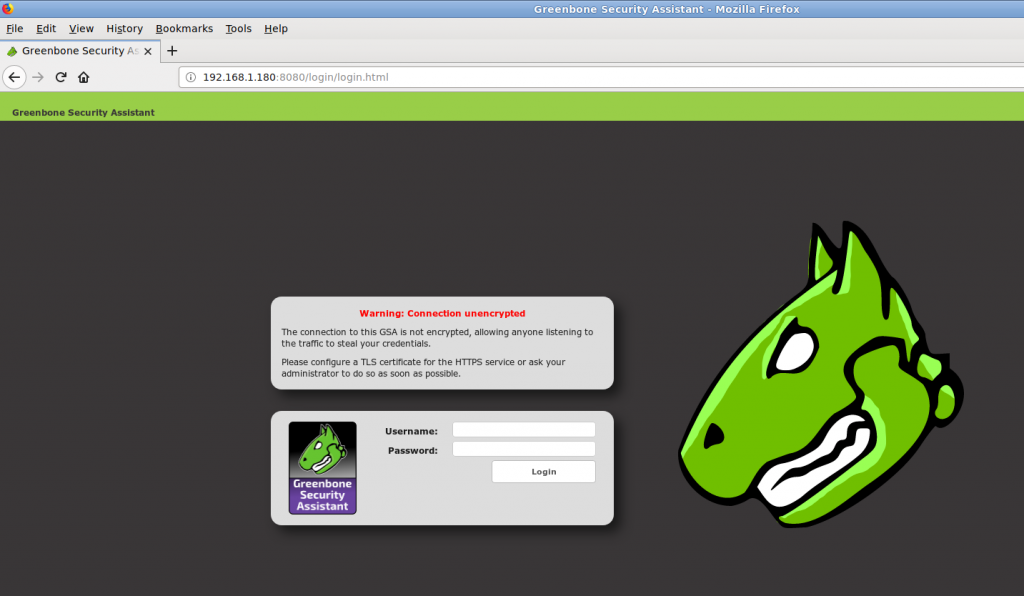
Be aware you are running on http, which is an unencrypted connection so anyone can sniff the username and password if you are running this install on the open wide internet. There shouldn’t be an issue in your local home network, although I wouldn’t put this on production without enabling SSL/TLS. Here is the official documentation on how to do that.
Tip: If something fails at login time, don’t panic. Just stop openvasmd. And start it again:
root@openvas:~ # openvasmd stop
root@openvas:~ #
root@openvas:~ # openvasmd start
root@openvas:~ #
Once logged in you should see a web interface similar to the following one:
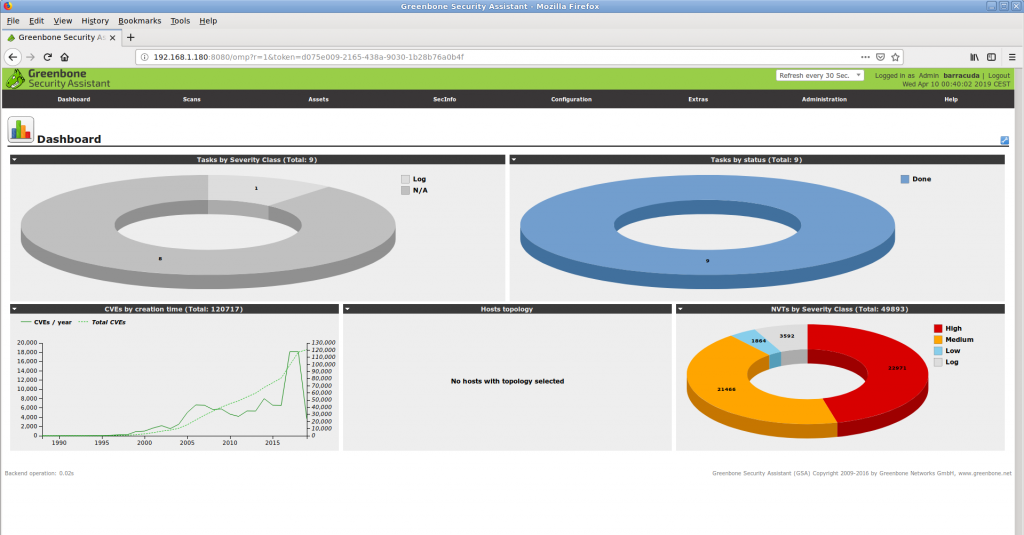
Now you can scan your devices, schedule vulnerability scans, get reports and start managing your infrastructure vulnerability wise.
While I am planning other articles and I haven’t written the how to use OpenVAS you can read the official guide from the vendor in the meantime. Enjoy!
This is all on the how to install OpenVAS on FreeBSD here at Adminbyaccident.com.
If you find the articles in Adminbyaccident.com useful to you, please consider making a donation.
Use this link to get $200 credit at DigitalOcean and support Adminbyaccident.com costs.
Get $100 credit for free at Vultr using this link and support Adminbyaccident.com costs.
Mind Vultr supports FreeBSD on their VPS offer.