AWStats is a very powerful and useful software allowing webmasters count the visits to their managed websites. The tool is basically coded in Perl and it was a very popular choice before Google made it way easy when they launched their Google Analytics tool. However, nowadays not everyone is using Google Analytics services and even it may be difficult to make use of it for corporations and governmental agencies alike. Here comes in AWStats in the modern web sphere. It can be used with Apache but with Nginx as well. This article is a how to install AWStats on FreeBSD using the Apache HTTP web server.
If you find the articles in Adminbyaccident.com useful to you, please consider making a donation.
Use this link to get $200 credit at DigitalOcean and support Adminbyaccident.com costs.
Get $100 credit for free at Vultr using this link and support Adminbyaccident.com costs.
Mind Vultr supports FreeBSD on their VPS offer.
Pre-requisites:
A FreeBSD box running Apache HTTP.
But probably that extends to a FreeBSD with a FAMP stack on. Github script in case you want to automate your install.
Step 1. Configure Apache HTTP to use CGI scripts
AWStats makes use of CGI scripts but Apache HTTP on FreeBSD has the module to execute those scripts disabled by default. Let’s enable that first.
We’ll first look for the module’s configuration line on the main Apache’s HTTP config file.
[root@awstats]# grep -n -B1 'mod_cgi' /usr/local/etc/apache24/httpd.conf
165-<IfModule !mpm_prefork_module>
166: LoadModule cgid_module libexec/apache24/mod_cgid.so
--
168-<IfModule mpm_prefork_module>
169: #LoadModule cgi_module libexec/apache24/mod_cgi.so
--
381- # ScriptSock: On threaded servers, designate the path to the UNIX
382: # socket used to communicate with the CGI daemon of mod_cgid.
[root@awstats]#
Depending on the Apache’s MPM module we’re using we’ll enable the CGI capability by uncommenting the lines 166 or 169. If you’ve used my Github’s script for a standard FAMP stack box you’re surely using the Pre-fork MPM, hence you need to uncomment line 169. However, if you’ve used the more performant Event enabled one (already linked in the pre-requisites section), you will need to uncomment line 166.
If in doubt of what MPM module you’re using here’s how to find out which MPM is being used.
[root@awstats]# apachectl -M | grep mpm
mpm_event_module (shared)
[root@awstats]#
In my case I’m using the Event MPM, so I must uncomment line 166. Use your favorite editor for such task and restart Apache HTTP so the changes take effect.
[root@awstats]# apachectl restart
To check the CGI module is really enabled use this next command.
[root@awstats]# apachectl -M | grep cgi
proxy_fcgi_module (shared)
cgid_module (shared)
[root@awstats]#
The highlighted line is the one you need to see to certify the CGI module is enabled on an Event MPM configured Apache HTTP box.
Optional. Adjust CGI scripts path and aliases in Apache HTTP.
With the CGI module enabled on Apache HTTP we need to adjust the path of the CGI scripts location from the default one to the AWStats one. The automatic script we’ll use on Step 2 does that change automatically, however it leaves the default path untouched. This is a security concern since any path for scripts that will not be used, specially the default ones, must be disabled so a potential attacker can’t make use of them.
Let’s find out where the default ‘cgi-bin’ data path entry and ‘ScriptAlias’ are present in Apache’s HTTP main configuration file.
[root@awstats]# grep -n 'cgi-bin' /usr/local/etc/apache24/httpd.conf
375: ScriptAlias /cgi-bin/ "/usr/local/www/apache24/cgi-bin/"
387:# "/usr/local/www/apache24/cgi-bin" should be changed to whatever your ScriptAliased
390:<Directory "/usr/local/www/apache24/cgi-bin">
467:#ErrorDocument 404 "/cgi-bin/missing_handler.pl"
[root@awstats]#
There is an ScriptAlias entry on the line 375 and a ‘cgi-bin’ path declared on a Directory directive on the line 390. Let’s just edit those and comment out using your favorite editor. Restart Apache HTTP after that so changes take effect.
Be aware of the Directory directive since it’s a bit longer than just one line. You’ll need to edit and comment out all that Directory entry in block.
Before changes in line 375:
ScriptAlias /cgi-bin/ "/usr/local/www/apache24/cgi-bin/"
After changes in line 375:
# ScriptAlias /cgi-bin/ "/usr/local/www/apache24/cgi-bin/"
Before changes in line 390:
<Directory "/usr/local/www/apache24/cgi-bin">
AllowOverride None
Options None
Require all granted
</Directory>
After changes in line 390:
#<Directory "/usr/local/www/apache24/cgi-bin">
# AllowOverride None
# Options None
# Require all granted
#</Directory>
Restart Apache HTTP
[root@awstats]# apachectl restart
With this first Apache HTTP adjustments we can now move to the next task which is installing AWStats itself on FreeBSD.
Step 2. Install AWStats
There’s nothing easiest on this guide than this. To install AWStats on FreeBSD one just needs to launch this next command.
[root@awstats ~]# pkg install -y awstats
=====
Message from awstats-7.8,1:
--
Use /usr/local/www/awstats/tools/awstats_configure.pl to set up your
hosts.
To activate awstats in your webserver, see the example files for
apache: /usr/local/share/doc/awstats/httpd_conf
nginx: /usr/local/share/doc/awstats/nginx/
[root@awstats ~]#
With AWStats installed let’s have a look at the documentation we are referred to in the install message. We’ll use the ‘less’ command.
Tip: To scroll down using the ‘less’ command just press the ‘enter’ key as much as you’d like and to quit reading the file just type ‘q’ and intro.
[root@awstats ~]# less /usr/local/share/doc/awstats/httpd_conf
We’re going to be displayed the configuration bits we need to put in Apache HTTP’s main configuration file plus a few comments. If we carefully read the fist one we’ll see there’s a perl script which will help installing AWStats with all the configuration bits. Let’s use that script.
Step 3. Configure AWStats
The official documentation for to setup AWStats can be found here. However, in order to install AWStats on FreeBSD and configure it we’ll use very similar instructions. First, we’ll perform the general configuration with the default script. Then we will enable the browser generation and access for AWStats reports and make a few other adjustments to get the most out of it.
3.0 AWStats general configuration.
To install AWStats on FreeBSD we’ll be using the default perl script that comes with the tool. To use it let’s visit the default AWStats path.
[root@awstats ]# cd /usr/local/www/awstats
[root@awstats /usr/local/www/awstats]#
From this path let’s launch the perl script as follows:
[root@awstats /usr/local/www/awstats]# /usr/local/www/awstats/tools/awstats_configure.pl
We’ll be asked a series of questions. Let’s see them.
-----> Running OS detected: Linux, BSD or Unix
-----> Check for web server install
Found Web server Apache config file '/usr/local/etc/apache24/httpd.conf'
-----> Check and complete web server config file '/usr/local/etc/apache24/httpd.conf'
Warning: You Apache config file contains directives to write 'common' log files
This means that some features can't work (os, browsers and keywords detection).
Do you want me to setup Apache to write 'combined' log files [y/N] ?
Depending on what you need your Apache HTTP install to log, you will decide yes or no here. Do also consider some AWStats features won’t work, such as knowing and displaying what type of OS and browser visitors are using, but more importantly you won’t know what keyword brought them to your site, unless you use the combined format for Apache’s logs.
If those things are important for your use case type yes. If they are not, just type no and move on. The difference between the two log types is small, since the ‘combined’ format is the same as the ‘common’ format but extended with two more registers. If you are still in doubt check Apache’s HTTP official documentation.
-----> Update model config file '/usr/local/www/awstats/cgi-bin/awstats.model.conf'
File awstats.model.conf updated.
-----> Need to create a new config file ?
Do you want me to build a new AWStats config/profile
file (required if first install) [y/N] ?
Because this is a new install you want to answer ‘yes’.
-----> Define config file name to create
What is the name of your web site or profile analysis ?
Example: www.mysite.com
Example: demo
Your web site, virtual server or profile name:
>
You probably want to use AWStats to monitor the visits of a specific site. Just type the domain or subdomain you need to monitor visits from. In my case I’ve used ‘awstatsdemo.com’.
-----> Define config file path
In which directory do you plan to store your config file(s) ?
Default: /etc/awstats
Directory path to store config file(s) (Enter for default):
>
I don’t encourage you to use the default and in pure FreeBSD fashion it’s more convenient to use the following path instead:
/usr/local/etc/awstats
The reason is simple. FreeBSD isn’t Linux and OS configuration files do sit on the /etc directory. However, applications you install later do sit on /usr/local/etc. This way there’s a clear separation of what is purely related to the OS and which is to third party software.
As the final part of this somewhat automated install script you’ll read something similar to this:
-----> Create config file '/usr/local/etc/awstats/awstats.awstatsdemo.com.conf'
Config file /usr/local/etc/awstats/awstats.awstatsdemo.com.conf created.
-----> Don't forget to restart manually your web server
-----> Add update process inside a scheduler
Sorry, configure.pl does not support automatic add to cron yet.
You can do it manually by adding the following command to your cron:
/usr/local/www/awstats/cgi-bin/awstats.pl -update -config=awstatsdemo.com
Or if you have several config files and prefer having only one command:
/usr/local/www/awstats/tools/awstats_updateall.pl now
Press ENTER to continue...
A SIMPLE config file has been created: /usr/local/etc/awstats/awstats.awstatsdemo.com.conf
You should have a look inside to check and change manually main parameters.
You can then manually update your statistics for 'awstatsdemo.com' with command:
> perl awstats.pl -update -config=awstatsdemo.com
You can also read your statistics for 'awstatsdemo.com' with URL:
> http://localhost/awstats/awstats.pl?config=awstatsdemo.com
Press ENTER to finish...
This last message already gives clues on what are the next steps. First, we’ll need to restart the Apache HTTP web server so the changes in the main configuration file take place.
[root@awstats /usr/local/www/awstats]# apachectl restart
After that message one can read a few commands to update the visitors count and related information.
To summarize what has happened so far:
- Apache’s HTTP log format has been changed to the ‘combined’ format from the typical ‘common’ one.
- Apache’s HTTP main configuration file has been modified with a few new entries so AWStats can be used.
- AWStats is now aware of what site it needs to monitor.
- A new configuration file for AWStats has been added to /usr/local/etc/awstats with the name of the site we want to monitor.
Despite all this AWStats isn’t ready yet to be used. What’s missing? A few bits.
Let’s first create a ‘data’ directory for AWStats inside its default path.
[root@awstats /usr/local/www/awstats]# mkdir /usr/local/www/awstats/data
[root@awstats /usr/local/www/awstats]#
Let’s now adjust ownership of the default AWStats directories.
[root@awstats /usr/local/www/awstats]# chown -R www:www /usr/local/www/awstats/
[root@awstats /usr/local/www/awstats]#
Now it’s time to edit the AWStats configuration file dedicated to our site/s of interest.
3.1 Configure AWStats count update via browser
AWStats can be used on a CLI manner, however doing so may fall short to report not just to management. Having a GUI experience is sometimes faster and easier. To achieve this you will have to edit the site’s configuration file in AWStats. Look for this string ‘AllowToUpdateStatsFromBrowser’ in that file and change the value from ‘0’ to ‘1’.
[root@awstats]# grep -n 'AllowToUpdateStatsFromBrowser=' /usr/local/etc/awstats/awstats.awstatsdemo.com.conf
258:AllowToUpdateStatsFromBrowser=0
[root@awstats]#
As you can see the directive sits on line 258 so now you know where exactly you must go. Once edited if you repeat the grep command you should see the value has changed from ‘0’ to ‘1’.
3.2 Adjust the AWStats’ LogFormat parameter
The default value for the ‘LogFormat’ parameter is set to ‘1’. However there are three other values. If you chose not to change the ‘LogFormat’ from the ‘common’ setting (default in Apache HTTP) to the combined one (recommended for AWStats use), the parameter value for the AWStats LogFormat should be set to ’4’. You may already find this parameter set correctly but nevertheless check it out. Use this next command to check the value.
[root@awstats]# grep -n 'LogFormat=' /usr/local/etc/awstats/awstats.awstatsdemo.com.conf
73:# With LogFormat=4, some features (browsers, os, keywords...) can't work.
126:LogFormat=1
[root@awstats]#
Adjust it with your favorite editor if needed.
3.3 Change the ‘DirData’ path parameter
Installing AWStats on FreeBSD is not the same as doing so on any other GNU/Linux distribution although it’s practically the same. The difference sits some of the default paths.
The default ‘DirData’ parameter in AWStats is ‘/var/lib/awstats’ however such path doesn’t exist on FreeBSD. So instead of leaving the default one has to change it to where the data is being stored. In this guide I’ve set that to the following directory.
/usr/local/www/awstats/data
To apply the change let’s first look for the ‘DirData’ entry so we can use our favorite editor.
[root@awstats]# grep -n 'DirData=' /usr/local/etc/awstats/awstats.awstatsdemo.com.conf
222:DirData="/var/lib/awstats"
375:# dynamic value for DirData (for example DirData="/home/__REMOTE_USER__") and
[root@awstats]#
Now grab your favorite editor and apply the change on line 222 where the ‘DirData’ directive sits.
Before
DirData="/var/lib/awstats"
After
DirData="/usr/local/www/awstats/data"
Note: In the general configuration we’ve created this data directory. If you happen to be hosting several sites you can create different named directories for each site and tune each specific configuration file so those point to the specifically named directories.
3.4 Adjust the ‘LogFile’ parameter
AWstats reads from logs written by Apache HTTP or NGINX web servers. In this guide we’re using Apache HTTP so we need to change the default ‘LogFile’ parameter value and adjust it to the real log file in actual use.
To look for the line where this parameter is sitting you can use the following command.
[root@awstats ~]# grep -n 'LogFile=' /usr/local/etc/awstats/awstats.awstatsdemo.com.conf
50:LogFile="/var/log/httpd/mylog.log"
--
435:PurgeLogFile=0
443:# This parameter is not used if PurgeLogFile=0
[root@awstats ~]#
As you can see the entry sits on line 50 and that’s the one one must change and adjust to the real value in use. Since I’m using the default naming convention in Apache HTTP the value will change to: “/var/log/httpd-access.log”.
Before
LogFile="/var/log/httpd/mylog.log"
After
LogFile=”/var/log/httpd-access.log”
Note: As mentioned above if you are in need to monitor different websites it is wise to have differently named Apache HTTP log files to identify visits on the different sites and also adjust this parameter accordingly.
Step 4. Creat the database for the AWStats statistics
On this how to install AWStats on FreeBSD we haven’t seen any statistic yet. Now that all the configuration bits are in place it’s time to generate the first statics and later see them on the browser.
As we’ve seen in the original install message AWStats sets a configuration file for the website you want to monitor. There’s also a perl script that when invoked it does update the site statistics. This script has to be used at least once prior to using your browser and make use of AWStats’s full potential.
The configuration file for the site the original install script created for this guide is this one:
Config file /usr/local/etc/awstats/awstats.awstatsdemo.com.conf created.
The awstats.pl script will read from that configuration and it will do its ‘magic’ thing, reading the Apache HTTP log as well, and will allow us to visit our browser and see some statistics from the site.
So, to use the script, in this guide, we’ll launch this next command:
/usr/local/www/awstats/cgi-bin/awstats.pl -update -config=awstatsdemo.com
Note: Adjust the domain name to the one you’re monitoring.
When launched this is you’ll expect to see.
[root@awstats ~]# /usr/local/www/awstats/cgi-bin/awstats.pl -update -config=awstatsdemo.com
Create/Update database for config "/usr/local/etc/awstats/awstats.awstatsdemo.com.conf" by AWStats version 7.8 (build 20200416)
From data in log file "/var/log/httpd-access.log"...
Phase 1 : First bypass old records, searching new record...
Direct access after last parsed record (after line 682)
Jumped lines in file: 682
Found 682 already parsed records.
Parsed lines in file: 33
Found 0 dropped records,
Found 0 comments,
Found 0 blank records,
Found 0 corrupted records,
Found 0 old records,
Found 33 new qualified records.
[root@awstats ~]#
Don’t panic if you don’t see any activity if you haven’t used or visited your website yet. Just grab your browser and surf you site. Then come back and use this above command.
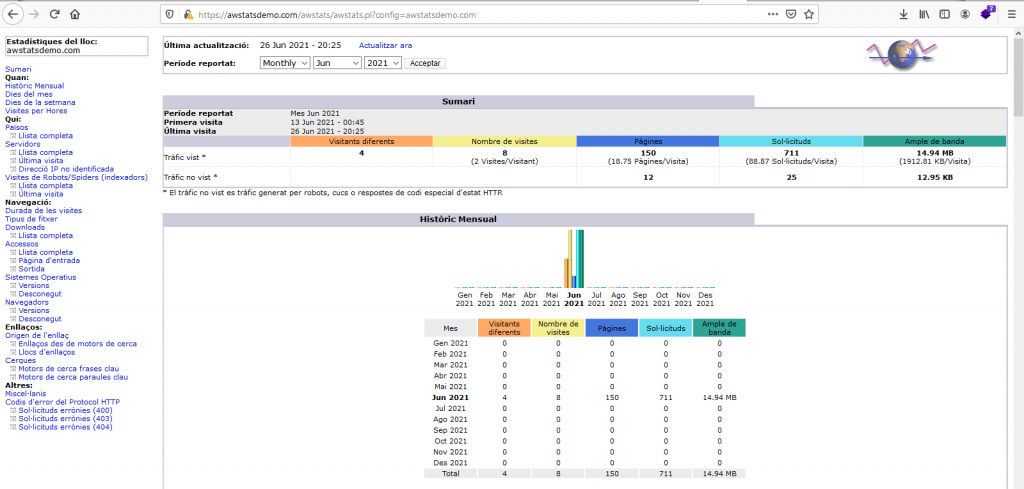
Once this database has been created you can use your browser of choice and check the visits and your site’s activity. However, you will first have to go through step 5 in order to access the statistics via browser.
Step 5. Grant access to AWStats users
One of the success factors of AWStats back on its date was the ability to see a site’s visits through a browser, the new GUI back in the day.
In order to be able to use that capability there’s one simple line to add to the Directory directive already set in Apache HTTP for AWStats. Just look for that entry with the following command.
[root@awstats]# grep -n 'Directory "/usr/local/www/awstats"' /usr/local/etc/apache24/httpd.conf
570:<Directory "/usr/local/www/awstats">
[root@awstats]#
That section should read as follows:
<Directory "/usr/local/www/awstats/">
Options None
AllowOverride None
Order allow,deny
Allow from all
</Directory>
The only modification we need to do is adding a ‘Require’ directive with a sensible parameter for us. For example, we can add the whole LAN IP addresses where we are sitting.
<Directory "/usr/local/www/awstats">
Options None
AllowOverride None
Order allow,deny
Allow from all
Require ip 192.168.1.1/24
</Directory>
Restart Apache HTTP so the changes are applied.
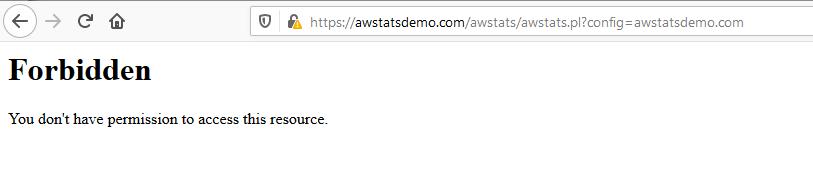
If someone out of the IP range we have defined tries to reach the AWStats statistics from our site this is what’s going to be displayed on his/her browser.
We can be a bit more restrictive and just set just one IP to access that URL by using this next directive.
Require ip 192.168.1.136
Remember to restart Apache HTTP so this newly placed directive is effective.
by visiting the following URL:
https://example.com/awstats/awstats.pl?config=example.com
Using this guide example I’m using this URL
https://awstatsdemo.com/awstats/awstats.pl?config=awstatsdemo.com
Note. In case we want to monitor several sites we can update the database information by using this next command (adjust the example domain to yours):
perl awstats.pl -update -config=example.com
Step 6. Secure AWStats access
So far, we haven’t secured any access on this AWStats on FreeBSD guide. It’s now time for that. Apache HTTP already has built in authentication mechanisms that we’ll leverage to control access to this install of AWStats on FreeBSD.
We’ll first create an empty file where AWStats passwords are going to be stored.
[root@awstats]# touch /usr/local/etc/awstats/passwd
[root@awstats]#
Now it’s time to create the password for the user to be granted access to this resource.
[root@awstats]# htpasswd -c /usr/local/etc/awstats/passwd albert
New password:
Re-type new password:
Adding password for user albert
[root@awstats]#
Now, in order to make use of this recently generated password we need to adjust the Directory directive concerning AWStats in the Apache’s HTTP main configuration file.
Before:
<Directory "/usr/local/www/awstats">
Options None
AllowOverride None
Order allow,deny
Allow from all
Require ip 192.168.1.1/24
</Directory>
After:
<Directory "/usr/local/www/awstats">
Options None
AllowOverride None
Order allow,deny
Allow from all
AuthType basic
AuthBasicProvider file
AuthName "Restricted Area"
AuthUserFile "/usr/local/etc/awstats/passwd"
Require valid-user
</Directory>
Once this configuration change has been applied in order for it to take effect one must restart Apache HTTP.
[root@awstats]# apachectl restart
Performing sanity check on apache24 configuration:
Syntax OK
Stopping apache24.
Waiting for PIDS: 84595.
Performing sanity check on apache24 configuration:
Syntax OK
Starting apache24.
[root@awstats]#
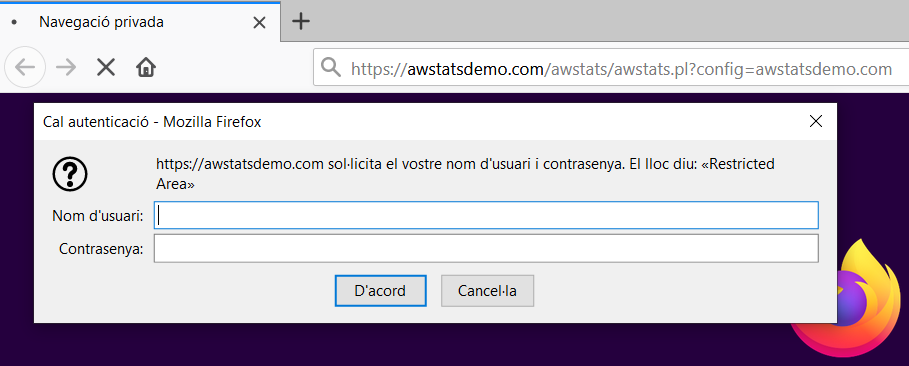
As it can be seen we’ll leverage the basic authentication module in Apache HTTP. If we now visit the URL to generate the statistics registered in AWStats from our website’s visits we’ll be granted with a prompt to introduce our username and password. If we fail to provide the correct combination, we won’t be able to see AWStats information.
With these three basic steps we have secured the access to our AWStats statistics.
Step 7. Automatically update statistics
This should be added, at least this is very recommended, to every AWStat install. Of course the browser ‘Update now’ button at the top of the GUI is very useful and performs well in order to update the statistics. However, it may be less time consuming to add a cronjob in the system so every now and then the statistics are automatically updated.
To update those figures twice a day, use the following command as root or elevate privileges with sudo,
crontab -e
and add the following content:
SHELL=/bin/sh
PATH=/etc:/bin:/sbin:/usr/bin:/usr/sbin
# Order of crontab fields
# minute hour mday month wday command
0 0,12 * * * /usr/local/www/awstats/cgi-bin/awstats.pl -update -config=awstatsdemo.com
If you want to schedule a different setting modify the time parameters so you dial it to your specific needs.
Alternatively to the command above you can also use this other one:
/usr/local/www/awstats/tools/awstats_updateall.pl
Conclusion
Installing AWStats on FreeBSD isn’t a difficult task. With this tool in our servers we can get real statistics from our sites and get more insight of what goes on, specially if we turn on the AWStats plugins.
As we’ve seen the task isn’t complicated but requires some steps. There are other much shorter guides available but I wanted to explain a bit more some bits so anyone installing this tool will have some more information than just a few commands and sentences of ‘do this’ or ‘do that’.
On a second piece we’ll see how to enable the geolocation plugins and get some more juice from AWStats on FreeBSD
Extra resource. This is the official documentation for AWstats
If you find the articles in Adminbyaccident.com useful to you, please consider making a donation.
Use this link to get $200 credit at DigitalOcean and support Adminbyaccident.com costs.
Get $100 credit for free at Vultr using this link and support Adminbyaccident.com costs.
Mind Vultr supports FreeBSD on their VPS offer.